Garlic-scape fergazza bread.

fergazza bread

My last memory of a proper loaf of fergazza bread is hazy – I was with my parents, on Granville Island, and I can’t remember the circumstances or anything else about the day, but we bought a loaf from one of the bakeries there and they put it in a bag and for some reason the bag was handed to me and I ate the entire loaf while we were wandering around and then I didn’t poop for four days. It’s weird what lives on in the mind.

Fergazza bread seems to be a local thing, or a Canadian thing, and not particularly common – you see it in the occasional bakery, but I’ve never seen a recipe for it and to be honest, I’m just guessing at the spelling. It’s not fougasse, though there are similarities. It’s a loaf of bread that’s crammed full of Cheddar cheese and green onions, with a herbs and a whisper of hot sauce. It’s wonderful toasted with a bit of butter, and you really could just mindlessly eat a whole loaf. Don’t do that, unless you’re prepared to have a lot more free time and a heavy abdominal sadness for a few days after.

img_5611

It’s pretty wonderful with green onions, and you could certainly use those if that’s what you have or if it’s not garlic scape season, but it’s garlic scape season right now so I’m just garlicking everything even more than usual – this might be my favourite application of garlic scapes yet.

I’ve found that by adding just a bit of beer to the dough, the result is a bread that’s just breadier. You can omit it if you prefer – just replace with water, and put the full amount of liquid in with the yeast at the beginning.

Fergazza Bread with Garlic Scapes

(Makes one 9″x5″ loaf)

  • 1 cup lukewarm water
  • 1 tbsp. granulated sugar
  • 1 tsp. yeast
  • 3 cups all-purpose flour, plus additional flour as needed for kneading
  • 1/4 cup beer
  • 4 tbsp. extra virgin olive oil, divided
  • 1 1/2 tsp. coarse salt
  • 1 tsp. dried oregano
  • 1/2 tsp. ground black pepper
  • 1/2 lb. cubed aged Cheddar cheese
  • 1/2 cup garlic scapes, chopped
  • 1 tbsp. sambal oelek or sriracha (or other chili paste or hot sauce)
  • 1 clove garlic, minced
  • Additional coarse salt, to top loaf

Combine water with sugar and yeast in a bowl and let rest for five minutes, until yeast is foamy.

Add yeast mixture to flour, with beer, one tablespoon of olive oil, salt, oregano, and pepper. Mix until a shaggy dough forms, then knead for eight minutes or until the dough is smooth and stretches when pulled. Form the dough into a ball. Place it into a greased bowl, cover with greased plastic wrap and a dishtowel, and let rest in a warm, draft-free space until doubled in size, about two hours.

Mix two tablespoons of olive oil with sambal oelek and garlic.

Once the dough has risen, spread it out over a clean, floured surface. Using a rolling pin, roll it to about 10″x14″. Paint the oil-sambal mixture over top, leaving about a half inch border all the way around. Sprinkle with garlic scapes, and scatter with cheese cubes. Form as tight and firm a roll as you can.

Fold the edges of the roll under, then place into a greased 9″x5″ loaf pan. Cover again, and let rise another hour to hour and a half.

Using a sharp knife, cut slits into the top of the loaf. Paint the top of the loaf with the remaining olive oil, and sprinkle with additional coarse salt. Bake for 45 to 50 minutes at 350°F. Check the bread halfway through baking – turn the pan, and if the loaf is browning too quickly cover it with foil for the remainder of your cooking time.

Remove the loaf from the pan and cool on a rack for at least an hour before serving.

bread

Something to Read: India, Ireland

sleeping

For some of us, it’s been a rough week. On Thursday, the little nugget started running warm and flu-like, and by Friday’s earliest hours, he was in full-blown fever mode, seizing and feverish and feeling pretty awful. We spent Saturday trying to convince his little belly to keep fluids down, and only now is Toddler back to normal.

We also had one particular hour-long Thomas (the really annoying train) movie going pretty much on repeat, which occupied my computer for most of those three days; we’ve now memorized a whole bunch of really annoying songs about hard work and helping out so we also didn’t get anything done.

So, with today, I’m now three books behind. Maybe goals are for people with free time? Maybe I’d be better to set small, reasonable goals, like “I will fold the laundry after taking it out of the dryer” or “I will open all the mail, even the scary envelopes?” Maybe I should get on with it and tell you about the books.

Let’s get international.

30days

The first book is one that I wanted desperately but that was kind of expensive so I had to wait and wait and wait and insist repeatedly that it would be a valuable resource and the best Christmas present ever. I just shouted down the hall at Nick to ask which occasion the book was and he said “It was definitely Christmas because it was too expensive – I wouldn’t spend that much on your birthday” which I guess means we’ve left the honeymoon phase.

I feel like all my books are either “kind of expensive but worth it” or “super cheap and amazing.” Anyway.

India

India Cookbook, by Pushpesh Pant, an Indian food writer and critic, is 815 pages and 1000 recipes, and “the definitive collection of recipes from all over India.” I cherish it the way other people cherish heirlooms or members of their extended family. This book is serious, and detailed, and gorgeous, and according the the cover, “the only book on Indian food you’ll ever need.” On this, I concur.

The book is thorough, and many of the recipes are long and involved, but the results have always been delicious and well worth the time and effort. There are recipes for spice mixtures and pastes, which you can make in large batches and use whenever you need them – this has been quite handy, though I’ll admit I’m moving into bigger and bigger Mason jars for storage and my cupboards are starting to look a little ridiculous.

Every recipe includes the Indian name of the dish, the English translation, the region of the recipe’s origin, and preparation and cooking time, and the number of servings, either in pieces or weight. The instructions are very detailed, and if, perhaps, you don’t have a coal fire over which to roast your lotus root, for example, alternative steps are included.

There are dishes from all over India, so there’s so much more than just the most popular stuff on the take-away menu. One thing I love about this book is that anytime I have a bunch of a vegetable I’m bored with just killing its last days in my crisper, I’ll refer to this book and find something new and exciting to do with cabbage or cauliflower or chickpeas (every vegetable, it seems, is given its place in the sun). India’s seemingly endless number of vegetarian dishes means that this book is a fabulous addition to the herbivore’s kitchen; often, the recipes also happen to be vegan-friendly, no adaptations necessary.

If you like Indian food, and want to learn more about it (and there is so much to learn), India Cookbook is worth the investment (it’s about $50 if you buy it online).

As it would otherwise be simply impossible to choose which recipe to share, I’ll give you the last one I made.

Parathas are dough patties stuffed with delicious stuff, which is essential to every culture’s cuisine, it seems. They are like pupusas, kind of – that’s my first point of comparison, so hopefully that makes sense to you. Basically, they are the best and you can make a ton of them and freeze them and then take them to work in your lunch bag and all your coworkers will be so jealous.

I simmered the potatoes for this recipe in coconut milk, because I wanted to slip some potatoes into Toddler and coconut milk is a sure-thing with him. You don’t have to do that – the recipe is perfect as it is.

Aloo ka Paratha

(Shallow-fried spicy potato stuffed bread; makes 4 or 5.)

Origin: Punjab/Delhi/Awadh
Preparation time: 1 hour
Cooking time: 30 minutes

  • 4 cups plus 3 tablespoons whole wheat flour, plus extra for dusting
  • Pinch of salt
  • 3/4 cup ghee (if you don’t have ghee, clarified butter will work but it’s not the same; vegetable oil will work in a pinch)

Filling:

  • 2 medium potatoes (9 oz.), unpeeled
  • 1 1/2 tablespoons chopped ginger
  • 6 green chilies, de-seeded and chopped
  • 1 large spring cilantro, chopped
  • 1 tablespoon dried pomegranate seeds (I didn’t have these; I used 2 teaspoons of amchoor powder; a squish of lemon will do in a pinch)
  • 1 teaspoon chili powder
  • Salt

Boil the potatoes whole for 20 minutes, or until soft. Drain, then cool. Peel off the skins, return the flesh to the pan, and then mash. Move the potatoes to a bowl, then add the ginger, chilies, coriander, pomegranate seeds, and chili powder. Mix, taste, season with salt, and then set aside.

Sift the flour and salt into another bowl. Mix in enough warm water to make a soft dough, about one and a half to two cups.

Knead the dough for about five minutes, then divide the dough into 8 to 10 equal portions and roll it into balls. Using a rolling pin (on a floured surface), flatten each ball to a disk about six inches in diameter.

Spread about a quarter (or a fifth, if you’re working with ten rounds) of the mixture on one disk, then top with the other and seal around the sides. Roll gently with a rolling pin until the rounds are sealed and have spread out to about seven inches in diameter.

Heat a heavy skillet over medium heat. Place a paratha in the pan, cook for 20 seconds, then turn over and cook for an additional 20 seconds. Repeat with each paratha.

Add the ghee to the pan, then fry each paratha until golden brown on both sides. Serve with mango pickle and yogurt. I also like them with ketchup, but I am ashamed of this.


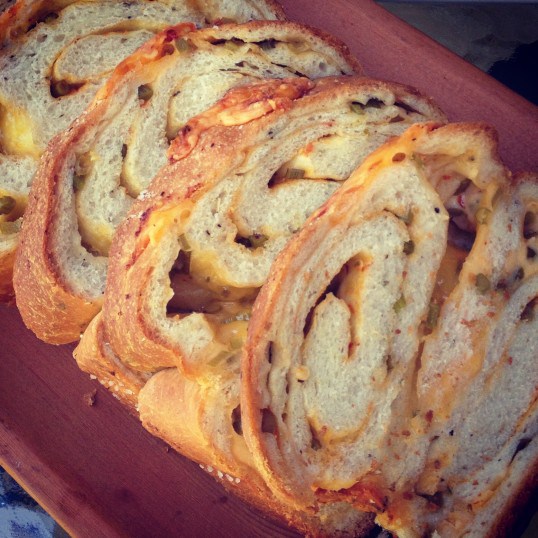
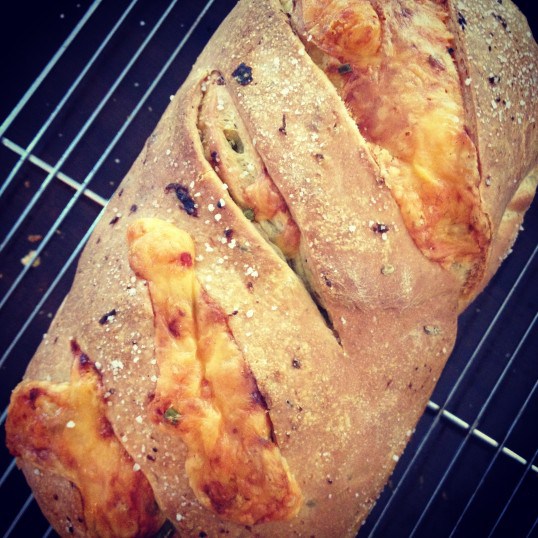
The next book I want to tell you about is one that fits into the “super cheap and amazing” category, but was also the result of being in the right place at the right time.

The place was a bookstore that was closing; the time was just before the book won a James Beard award (Best International Cookbook, 2010) and came out with a new cover. The book is The Country Cooking of Ireland, and it’s by Colman Andrews, one of the guys who founded Saveur Magazine.

ccoi

Most people probably don’t think of Ireland as being a great place to grab something to eat, but in fact Ireland is basically a nation of comfort food and good beer. It’s full of good farmland and, since it’s an island, it’s in close proximity to all the best fish and shellfish. It’s not just potatoes, though they are well-represented among the 225 recipes contained in the book (which I don’t think is a bad thing – potatoes are the best, obviously). Among the recipes are stories of Ireland – the history, the people, the cookbooks; it’s as informative as it is lovely, with pictures that make you gaze out your own window and sigh, longingly.

I’ve made quite a few of the recipes in the book, for everything from Irish Stew to Donegal Pie, a cheap and easy dish made of potatoes, chives, hard-boiled eggs, bacon and shortcrust pastry. The food is hearty and warming, and makes sensible and interesting use of affordable ingredients.

One of the recipes I am fond of is the Battered Sausages, which, according to the book (and my stomach) are “admittedly dietarily excessive and nutritionally incorrect.” I’m trying to understand how that’s not a selling feature.

“A staple at gas-station food counters all over Ireland, battered sausages are usually grim and greasy. If made correctly though, they can be a real treat.”

Battered Sausages

(Serves 4.)

  • 2 packets active dry yeast
  • 1 1/4 cups stout, preferably Guinness
  • 2 3/4 cups all-purpose flour
  • 1 tsp. salt
  • Oil, for frying
  • 12 small breakfast sausages (not the maple kind)

Whisk together the yeast and the beer. In another bowl, sift together 2 1/4 cups of the flour and the salt. Stir the yeast mixture into the flour mixture, mixing well. Let stand at room temperature for an hour.

Heat about six inches of oil in a heavy-bottomed pot, such as a cast-iron or enameled cast-iron Dutch oven. Heat to 350°F.

Toss the sausages with the remaining flour, then dip into the batter. Deep-fry the sausages, a few at a time, for about eight minutes each. Drain the sausages on a wire rack over a pie plate until you’re finished frying; serve hot. Then take a nap.

Overnight pancakes.

MESS.

For the past two weeks, this household has been in the sick of things, each of us weighed down by an assortment of pains and ailments, from migraines and colds to flus and sinus infections. I wish I could say that I have taken charge of our healing by simmering wholesome and restorative meals rich in love and nutrients. That would have been nice of me.

Last Wednesday the sick was so bad I skipped lunch and napped under my desk for an hour. The next day I took a sick day, and by the weekend I was sure I was going to die. I begged Nick to smother me, and when he wouldn’t I chastised him for not taking advantage of the out I had offered him. I tried to smother myself but the cat thought we were playing a game and ruined it.

By Monday this past week I was certain I had cracked some teeth coughing, so I made a dental appointment. The good news is the teeth are fine; the bad news is my sinuses are pretty angry and infected. The worst news is that my wisdom teeth are pretty much one with my skull now but they have to be removed so it sounds like it’s bone-saw time. That’s the worst time!

2013 has not been off to a good start. And now that I have managed to attain a functional balance of NyQuil, antibiotics and codeine, the baby has finally succumbed and is fevered with a face full of ick.

It’s times like these when I can’t fathom coming down off my prescription and cough syrup high to go to the grocery store. We are out of eggs. And we had a late night. So somewhere between rescuing the little guy from a coughing fit and the two of us passing out in the dark, I whisked together some flour, water, yeast, honey and salt for pancake batter. If all three of us woke up in the morning, we would have pancakes. It would be a kind of reward.

Nighttime batter


Morning batter

This recipe makes 6 pancakes, and will serve between two and three people, depending on how hungry you are, or how much bacon your version of Nick decided to make. I like these topped with berries, or with chestnut cream. Because they are more like fried bread than flapjacks, you could take savoury liberties with them – try them with sour cream and apple sauce, or with cottage cheese and thinly sliced scallions, if that pleases you.

As a note – the berries on these were a mix of a pound of frozen strawberries, a tablespoon of cornstarch, a tablespoon of honey, and half a teaspoon of vanilla, simmered until the berries softened and released their juices and the whole thing thickened pleasingly.

Pretty pancakes.

Lazy pancakes

  • 1/2 tsp. dry yeast
  • 1/2 tsp. salt
  • 2 tsp. honey
  • 1 cup all-purpose flour
  • 1 cup water
  • 3 tbsp. vegetable or canola oil
  • 1 tbsp. butter

Whisk ingredients together in a bowl. Cover the bowl with plastic wrap, and stick it in the fridge overnight.

30 minutes to an hour before you’re ready to cook, take the bowl out of the fridge and let it rest at room temperature. Heat the oil and butter in a large pan over medium-high heat.

Gently spoon your pancakes into the pan, taking care not to stir the batter. Cook until edges appear crispy and bubbles form through each cake, about two minutes. Flip, and cook an additional two minutes, or until golden and puffed.

Serve hot, with a compote of berries, or maple syrup, or sour cream and apple sauce.

Fluffy!

Stuffing ball soup.

If you’re Canadian, it’s nearly Thanksgiving – it’s less than a month away! And I’ve been quite enjoying the soothing fall flavours that have started to take over the kitchen. Roasted tomatoes, fresh-from-the-ground carrots, and big fat pink, purple, and golden beets – all good things, and are you also getting so impatient for pumpkins?

Nick’s been on the cusp of a cold, and I’ve been avoiding it as best I can, and while eating soup can soothe those icky, snotty early cold feelings, the cooking of soup creates an ambiance of comfort, and I don’t know about you but just the smell of chicken stock and veggies burbling away makes me feel so much better, almost right away. Homemade chicken stock is even better – I don’t know what it is, but the rasp in my voice disappears as rich, meaty steam fills the air.

Add dumplings? You’ve got the perfect autumn lunch or dinner, with all the tastes of Thanksgiving  in a bowl. Stuffing balls, which are not unlike matzoh balls (though if you are a matzoh ball purist, then they are so unlike matzoh balls), are light and fluffy, and taste of sage, savoury, garlic, and thyme. Too much butter is involved, which is always good. You can’t have too much butter, I don’t care what Jenny Craig says about it.

Stuffing ball soup

  • 2 cups fresh bread crumbs (about 8 oz. of day-old bread, blended or food-processed until only crumbs remain)
  • 1/4 cup finely minced celery
  • 2 tbsp. finely minced onion
  • 2 cloves minced garlic
  • 1 tbsp. minced fresh parsley plus 3 tbsp. chopped fresh parsley, divided
  • 1 tsp. dried savoury
  • 1 tsp. dried sage
  • 1/2 tsp. dried thyme
  • 1/2 tsp. ground black pepper
  • 1/2 tsp. salt
  • 4 eggs
  • 1/2 cup melted butter (muah ha ha!)
  • 8 to 10 cups chicken stock (good quality is important – best results obtained if you make your own)
  • 1 tbsp. lemon juice

Optional:

  • 2 cups diced root vegetables

In a large bowl, combine bread crumbs, celery, onion, garlic, one tablespoon of parsley, savoury, sage, thyme, pepper, and salt. Do not use dry bread crumbs; they are a different animal. Use fresh, if you have to leave a few thick slices of bread out overnight to get stale.

In a separate bowl, beat eggs extremely thoroughly. Whisk in melted butter, then pour over crumb mixture. Mix thoroughly, then cover with plastic and place in the fridge for about 45 minutes.

Roll mixture into balls about an inch in diameter. Keep in mind that the bigger you roll them, the more enormous they will get once cooked – they triple in size as they cook. The recipe makes about 20 balls. At this point, if you are going to use less stock and make less soup, you can freeze rolled stuffing balls. If you’re going to do that, stick them on a baking sheet lined with parchment and freeze until solid, then drop into a plastic bag for later use.

If you’re making the full batch, use lots of stock, to which you will add the lemon juice. Bring it to a gentle simmer over medium-high heat, then drop in veggies, if using. Turn heat to medium, then drop stuffing balls into the pot. Cover with a lid, and let cook for 15 minutes.

Serve hot, garnished with remaining parsley. And if you’re sort of sickish, eat two or three big bowls of the stuff, curled up on the couch, perhaps with your version of Nick, who has perhaps been secretly excited about the finale of America’s Got Talent, even though he won’t say it out loud.


Roasted tomato pizza.

We’re getting to the best time of the year now. The tomatoes that were so bright and lovely a few weeks ago are now mottled and sweet, and they beg to be roasted low and slow or stewed down for sauces, and since the air outside has cooled a bit I have no reason not to but oblige them. On Alana’s advice, I roasted a whole bunch of field tomatoes last week and stuck them in the freezer, but I still had a few romas, a hankering for bread and cheese, and a resurgence of old lady disease in my limbs, hands, back, and left big toe that made me not want to put in a lot of labour.

This post is mostly pictures, because I made my focaccia bread for the crust (all the ingredients up to the flour, plus salt – the recipe will make two pizzas if you’d prefer not to make one gigantic one), made pesto for the sauce, and roasted tomatoes for hours and hours to put on top. And then cheese. It’s also short because we made a trip to the garden … let’s just say this is a two-post night. (I know. I’m excited too.)

The aroma in the apartment was amazing, and a valid argument for always working from home. Tomatoes develop a sweeter taste as they roast down, but they smell almost meaty, with a lusty musk that is distinctive to this exact moment in the tomato season. Capture it while you can.

You can see how the light changed as the hours past while the pizza slowly came together. The focaccia crust isn’t the sort of thing you’d make on a weeknight ordinarily, but if you’re in no rush it’s perfect for homemade pizza.

There’s a lot to be said for homemade pizza, whether you dawdle over homemade, buy the dough from your favourite take-away place, or just get frozen dough from the grocery store. The advantage to using dough over a premade crust (other than not having to eat something that pretty much tastes like cardboard and has weird speckles of what you kind of recognize as “cheese” all over the thing) is that you get the smell of baking bread, which is the best thing about pizza, aside from all the cheese. Use whatever cheese you like, but (and this will seem completely out of character) I prefer low-fat mozzarella, because it’s stringier and I like my pizza cheese stringy.

The other thing about making your own pizza is that you get to put whatever you like on it, and you don’t have to feel crushing disappointment when Domino’s puts green peppers on anyway even after you told them how much you hate them. So, you get the satisfaction of the smell of bread baking, as much cheese as you want, whatever toppings you want, and nobody cries because there are green peppers.

And if tomatoes aren’t your thing, you should try this in October with butternut squash, rosemary, roasted garlic, and Gruyere. Holy crap, it will change your life. Try it and get back to me.

Cinnamon breakfast bread.

Amazing what one’s draft folder sometimes contains! I went to clean it out today because I start a lot of things and never finish and I don’t need reminders that I am flaky and noncommittal, and discovered that I went to all the trouble of typing out the recipe for my lazy breakfast bread, and then discovered that all the blurry pictures were saved to a folder on my desktop. So, it’s like the post wrote itself, really, and I am just relaying it to you now, after the fact.

But I’ll tell you about the bread anyway, because this is the kind of thing you can make for brunch when you forget until that morning that you had invited people to your apartment for brunch and you have nothing but canned tomatoes and a bag of frozen peas to feed them. The bread only requires one rise, and is essentially cinnamon buns in loaf form. By using fresh-made cornmeal mush, you get the advantage of heat in the dough, which speeds up the yeast proofing and dough rising, and it also lends a nice texture. You could also use cream of wheat or oat bran – whatever fine-textured hot cereal you have on hand will do.

This not a bread with a lot of complex, yeasty nuances, but that’s not the point. The cinnamon and sugar are the point, and when you’re short on time or just don’t feel like waiting, this is a good go-to loaf. You can fill it with things other than cinnamon and sugar if you prefer – cheese and bacon are always favourites, and sundried tomatoes and herbs are also nice. You could use raisins, but I hate raisins, so I’ll never be able to tell you whether that variation is good or not, but other dried fruits (with butter!) might be interesting. Play with it. And if you have time, give it a little bit longer to rise – it’ll puff up more, giving you more loaf to enjoy later.

Cinnamon breakfast bread

Bread:

  • 1/4 cup cornmeal
  • 1/2 cup water
  • 1/2 cup milk
  • 1 tbsp. butter
  • 1 tsp. granulated sugar
  • 1 package yeast (2 1/4 tsp.)
  • 2 cups all-purpose flour, plus extra for kneading

Filling:

  • 1 tbsp. butter
  • 1/2 cup brown sugar
  • 1 tsp. cinnamon

In a small pan, cook cornmeal in 1/2 cup of water. When water has been full absorbed by cornmeal, stir in milk, butter, sugar, and yeast. Let stand five minutes.

Measure flour into a bowl and pour warm corn/yeast mixture over top. Mix well, and then turn out onto a floured surface to knead. Knead 10 times. Cover and let rest, 10 minutes.

Grease a 9″x5″ loaf pan with butter. Set aside. Roll dough out until it is 9″ wide and about 13″ long. Spread with butter, leaving an inch on the outside on all sides. Sprinkle with evenly with brown sugar, pressing down on sugar with your hands to flatten it. Sprinkle with cinnamon.

Roll width-wise, tucking the edges of the dough in as you go. You should end up with a log that will fit quite nicely into your pan.

Cover with plastic and let rise, 30 to 60 minutes.

Bake at 375°F for 20 to 25 minutes.

Let cool for five minutes in the pan, and then turn out onto a wire rack. Slice and serve warm, with butter. What you’ll end up with is a delicious cinnamon-bun-type loaf that, if you’re lucky and there’s leftovers, makes a fantastic French toast for breakfast the following day.

There. That was easy! And with the little effort I put into this one, I feel that the next thing should be a little premeditated, a bit more effort.

Oh! And thank you to Linda for her kind words on her blog! I feel like I should respond with a list of my own favourite food sites, so I will do so later this week. I will do that, and maybe something with radishes, because they are so in season and so lovely right now. So, stay tuned. Something good will happen here, I promise.

Good olive oil, run-on sentences, and bread soup.

I have long felt hard done by for the lack of a large Italian grandmother in my life. My grandmothers have all been quite fantastic, of course, but we’re so Canadian that one not-too-distant relative was mentioned briefly in a Farley Mowat book, which I am pretty sure is the Canadian equivalent of boasting ancestors arriving on the Mayflower. Which is not to say that Canadian is a milquetoast heritage – it’s got more than its share of culinary ooh-la-la, and not just what Americans call Canadian Bacon (which is actually just ham). But what it doesn’t have is olive oil.

You know where does have fantastic olive oil, though? San Francisco. So maybe an Italian grandmother is not entirely what I need – maybe I need an American BFF instead.

Years ago I discovered the good olive oil, and it comes from a shop in the Ferry Building on the Embarcadero. It’s made from organically grown California olives, and I would do some very morally questionable things to have access to a lifetime’s supply. Unfortunately, they don’t ship to Canada. It’s like being in love with someone who doesn’t return your calls.

So when we went back recently, I had but two orders of business: get myself to City Lights Bookstore which is the kind of place I nearly fall down weeping at the entrance to which means that I chose the right major in spite of the long-term earning potential I sacrificed; and, get to the Ferry Building for the good olive oil. I misjudged the distance from Fisherman’s Warf to our oily destination, causing my party of five to have to hike nearly thirty minutes in bad footwear, but it was totally worth it. For me.

What I love about the good olive oil – Stonehouse Olive Oil, if you’re too lazy or captivated by my elegant prose to click the link above – is that it tastes how I imagine fresh olive oil in Italy would. They sell each batch the same year it’s harvested, so it’s as fresh as you can get without actually sticking your face under the olive press.

Oh, San Francisco – what scandalous, depraved, excellent things I would do to be able to live with you forever.

Anyway, I got the oil, and I’m hoarding it. Except I used some tonight, a good amount of it for someone who is unsure when they’ll be back to the States to get more. We had soup – an enormous pot of it, because it’s the week before payday and we’re just back from vacation and OMG-broke, like, so much so that I jammed the vending machine at work with foreign money this morning trying to get an orange juice. I make big pots of soup when I’d prefer to stretch a meal into three to avoid starvation, and this, made of pantry staples, will take us handsomely through lunch and all the way to dinner tomorrow. For regular households, that means eight to ten servings. It’s easily adapted to smaller feedlots, however, so fiddle with it until it’s to your liking.

Bread Soup

(Serves 8 to 10.)

  • 1/4 cup good olive oil (I don’t believe I ever specify extra-virgin, but it’s what I mean by good olive oil)
  • 5 cloves garlic, roughly chopped
  • 1/2 lb. stale bread, cubed and toasted (about four thick slices)
  • 2 28 oz. cans whole tomatoes, plus juice
  • 1/2 cup red wine
  • 4 cups vegetable or chicken stock
  • 1 19 oz. can cannelini or white kidney beans
  • 1/2 cup grated Parmesan cheese
  • 1/2 cup chopped fresh parsley (flat-leaf is better, but the curly stuff is okay if that’s all you can get)
  • 1 tbsp. lemon zest
  • As much pepper as you feel you need

In a large pot over medium-high heat, warm olive oil. When olive oil is hot, add garlic, and sauté until fragrant and lightly golden, about two minutes.

Meanwhile, whizz bread cubes in a food processor or blender until you end up with coarse crumbs. You don’t want to grind the bread too finely, or you will end up with a soup with boring texture, and no one wants that.

Add bread crumbs to the oil, and stir to coat. Immediately begin squishing tomatoes into the mix, adding juice quickly and scraping the bottom of the pot to ensure nothing burns to it. Add the wine. Stir again. Add the broth.

Reduce heat to medium, and simmer, uncovered, for 30 minutes.

After a half-hour, add beans, cheese, parsley, lemon zest, and pepper. Simmer an additional five minutes, until parsley has wilted and the whole thing smells magnificent.

If it’s a dark and stormy night and the water runs down the window so fast your cat can’t keep up with the drops, serve piping hot, with a swirl of your favourite olive oil, a lemon wedge, and a fat hunk of crusty fresh bread. And wine. Red wine. If it’s not, this is pretty nice chilled, like a hearty gazpacho, but serve with a charming white wine, a Pinot Grigio or a Sauvignon Blanc instead.

It’s delicious on the first round, like a bread and bean stew, but even better the second day. The hallmark of a quality meal, if you ask me and my imaginary Italian grandmother.

Chicken and spinach calzones.

We make and eat a lot of pizza around here – it’s my go-to meal when a bunch of people show up and are hungry. Last summer I discovered my new favourite easy crust, and there’s been no going back – I make it all the time. I change it from time to time – whole wheat flour, a little bit of buckwheat flour every so often, or spelt even. I let it rise a little for a thicker pizza, which is how I like it, or roll it out flat for a thinner crust. Or, sometimes, I add a little bit of semolina flour, give it 30 minutes in a warm kitchen, cut it into eight pieces, roll each piece out until it’s barely as thin as a pie crust, and stuff it with sauce and cheese.

Calzones are a treat, and they’re awesome for lunches at work or school – they’re pizza pops, but with none of that chemical stuff that’ll probably kill you. Cheese, a little sauce, some veggies and meat if you want – and you can stick them in the freezer and reheat them as you need them, in the microwave or toaster oven, whatever you’ve got. And if you’re using an easy crust, they’re the kind of thing you can serve on a weeknight, or even to company, with a little bit of salad and not much else.

If you use leftover chicken, even better! Less effort, so you have more time for drinking beer and inhaling the smell of baking pizza. Which is infinitely better than ordering delivery, even though delivery is easier. Some things are just worth a little bit more time, and people will like you more if you serve them calzones over take out schlock. Some of us need all the help we can get in that regard.

Chicken and spinach calzones

(Makes 8.)

Dough (inspired by a recipe from everybody likes sandwiches):

  • 1 package yeast (or 2 1/4 tsp.)
  • 1 tsp. honey
  • 1 cup warm water
  • 2 cups all-purpose flour
  • 1/2 cup semolina flour (if you don’t have this, it’s not crucial; just use regular flour, or sub whole-wheat, if you want)
  • 2 tbsp. olive oil
  • 1 tsp. salt

Filling

  • 2 tbsp. olive oil
  • 1 medium onion, chopped
  • 3 cloves garlic, chopped
  • 1 28 oz. can crushed tomatoes
  • 2 cups shredded cooked chicken
  • 2 cups packed fresh spinach, roughly chopped
  • 1 tbsp. chopped fresh basil
  • 2 tsp. ground black pepper
  • 1 tsp. lemon zest
  • Salt, to taste
  • 2 cups grated mozzarella cheese

In a large bowl, combine yeast, honey, and water, and let stand until foamy, about five minutes. Add flour, semolina flour, oil, and salt and stir to combine. Turn out onto a floured surface, knead ten times, and then place in a greased bowl and cover with greased plastic wrap and allow to rise in a warm place for 30 to 40 minutes.

Use semolina if you can, because it’s extra nice in this kind of crust. It’s a coarser flour, and it produces an excellent crispiness that you’ll want in your calzones. Regular old all-purpose will work fine if that’s what you’ve got, but semolina is a nice touch. A little goes a long way too – spend the two dollars, and you’ll have a bag that will last you a long time, and you can add it to homemade pastas and breads and all kinds of things.

In a large skillet over medium-high heat, heat onions in olive oil until shimmering. Add garlic, stir and saute for another minute, and then add crushed tomatoes. Reduce heat to medium, then add chicken, spinach, lemon zest, garlic, and basil. Taste, adjust salt as needed, and set aside.

Cut dough into four equal pieces, and then cut each piece in half. Roll each piece out until it is no more than 1/8-inch thick – it should be as round as possible, about the size of a small plate.

Preheat oven to 375°F.

Spoon filling onto dough, dividing the amount as equally as possible between all eight rounds. Place the filling slightly above the centre of the dough, so that when you fold the short side of the dough over top of the filling, you still have an inch or so of dough on the other side. Place 1/4-cup of cheese on top of each scoop of filling, and fold dough over.

Press dough down gently to seal, and then fold the remaining dough over the crease to seal. You’ll end up with a sort of scalloped pattern, as you fold each bit of dough over the last. (See below.)

Place gently on a baking sheet lined with parchment or sprinkled with cornmeal. I bake these four to a sheet, with at least an inch between them, as they’ll puff up a bit and get bigger.

Bake for 20 minutes, or until golden brown. Serve hot.

If you’re not going to serve them all right away, you can cool the rest on a wire rack, and then wrap up and freeze. Reheat as needed.

Mexico, St. Lorenzo, and some brunchy buns that belong to both.

My mom keeps talking about these little bread treats called St. Lorenzo buns. Apparently they’re a buttery Mexican treat that have a glob of cheese in the centre, and they are served warm at breakfast-time at at least one resort. Unfortunately, they don’t seem to exist anywhere but that resort and/or my mom’s imagination, as a Google search turned up nothing, even when I varied the spelling. All I’ve got to go on is that they’re pretty much savoury, and that they have a soft cheese in the centre.

I emailed Alana at Eating from the Ground Up, as she’s doing some very accessible (and delicious) homemade cheeses these days, to see if she knew of a cheese similar to what Mom vaguely described. She had a few good ideas, but I wasn’t sure about the texture, and about using apple cider vinegar – aren’t apples a rare treat in Mexico? I wanted to use limes. (Even when asking for help I’m a stubborn know-it-all. The worst kind.)

If you know how the cheese in these is supposed to be, or if you know what these buns are and can help me, please let me know. I think the cheese should be something like panela, which is similar-ish to ricotta, I guess. My mom said it should be creamier, like cream cheese (or mascarpone), which you could use as well (1 tbsp. per bun). I like a challenge, but I’ve started with too few facts to produce a reliable facsimile of the buns. Unless you can determine that the following recipe is a reasonable facsimile … in that case, compliments and adoration will do.

Saint Lorenzo buns

Cheese (based on this recipe here):

  • 4 cups whole milk
  • 1/2 cup cream
  • 2 1/2 tbsp. lime juice (lemon’s fine if that’s what you’ve got)
  • 1 tsp. salt

Buns:

  • 1 package dry yeast (2 1/4 tsp.)
  • 1/4 cup honey
  • 2 tbsp butter
  • 1 cup cream
  • 1 egg
  • 3 cups flour
  • 1/2 tsp salt

The night you make the buns, set cold milk and cream in a pot over low heat. Add lime juice. Using a candy thermometer, bring milk to 180°F. Don’t rush it. This should take an hour. Once there, increase temperature to medium, and allow liquid to come to a boil, just over 200°F. The curd will begin to separate from the whey – the whole thing will resemble icebergs in a murky sea.

Remove pot from heat, and let stand 10 minutes. Drain in a colander lined with cheesecloth, 15 minutes.

Stir salt into mixture (still in cheesecloth), then knot around a cupboard door handle and allow to hang for two or three hours, until liquid no longer drips from cheese.

Press cheese (still in cheesecloth) between the bottoms of two small plates, the top plate weighted with a brick or a couple cans of beans, and refrigerate overnight.

If you’d rather go with store-bought ricotta, you’ll still want to drain the excess liquid out – strain about a cup of ricotta in a colander lined with cheesecloth, a clean (non-linty) dish towel, or some paper towel overnight in the fridge.

To make the buns, begin by pouring yeast into the bottom of a large bowl. In a saucepan, combine cream, honey, and butter, heating until butter has just begun to melt. Whisk to ensure that honey doesn’t stick to the bottom. Pour over yeast and allow to stand until yeast is frothy, about five minutes.

When yeast is frothy, whisk egg into the mix, then add flour gradually, forming a paste at first, ensuring it is well-combined every step of the way. Continue adding flour until a soft dough forms. Turn out onto a floured surface, dusting with additional flour as needed for kneading. Knead until dough becomes smooth and elastic, about five minutes.

Let stand in a lightly greased bowl covered in plastic wrap until doubled in size, about an hour. Lightly butter 12 muffin tins. Slice pressed/drained cheese into 12 equal pieces (about one tablespoon each).

Turn back out onto a floured surface and cut the dough in half. Cut each half into three equal pieces, and then cut each piece in two, so that you have 12 pieces. Stretch each piece out in your palm, pressing a piece of cheese into the centre and folding the edges of the dough around the cheese, pinching the opening closed at the top.

Drop each bun into a muffin tin, and cover the whole thing with plastic. Allow to rise again, until doubled (ish), another hour.

Preheat oven to 375°F. Remove plastic from buns, pinch closed any buns that have opened, and stuff the whole thing in the oven, for 18 to 20 minutes, or until golden on the tops and fragrant all over.

Serve warm, possibly for brunch, definitely with something delicious, like breakfast cocktails. The buns are lightly sweet, and very buttery, flaky and soft in the centre. So, maybe a cava and orange juice would be ideal? I’ll leave that part to you.

Burger night, but we had no buns or money.

It occurred to me recently that the reason all of my work clothes were faded and full of holes is that I haven’t actually bought anything for work in years, which also explains why I had begun to look so slovenly and outmoded. I am the kind of person who will go shopping for pants and come home with a sequined party dress, so was no surprise that I didn’t have anything practical that I could wear for a job interview I’ve got this week. So we looked at our bank accounts, decided that we’ve been responsible enough with our bills lately and that they could be ignored this payday, and determined that I could go shopping if I was smart about it and promised not to buy anything with sequins. If I get the job, I’m going to buy whatever dress I want.

So, because I had to buy a lot of grey and black clothes, and because we were down to our last as far as essential grocery items, and because life is full of surprises, this has been a big spending week, and now we’re poor again. But I wanted turkey burgers, because had ground turkey thighs in the freezer and one last jar of zucchini relish in the cupboard. The only thing we didn’t have was buns. Solution? Homemade hamburger buns.

The recipe is based on a recipe I dug out of the old Fannie Farmer, but I’ve adapted it to suit normal people’s lives. Who keeps dried milk powder on hand, and how many people other than me hoard lard in their freezer for no particular reason other than greed? I have no idea, but I think no one. This is a more modern, much more convenient take on things.

Hamburger buns

(Makes 12)

  • 2 packages (or 4 1/2 tsp.) dry yeast
  • 1 tbsp. honey
  • 1 1/2 cup milk, warmed slightly
  • 1/3 cup butter, melted (alternative: use olive oil, if you prefer)
  • 1 egg
  • 1/2 tsp. salt
  • 5 cups all-purpose flour

In a large bowl, whisk together yeast, honey, and milk. Let stand for five minutes, or until yeast has begun to foam on top.

Mix butter, egg, and salt, and stir into the yeast mixture. Add two cups flour, and stir until a paste has formed. Gradually add the rest of the flour until the paste becomes a dough.

Turn out onto a floured surface, knead for about a minute, and then cover with a kitchen towel and allow to rest for ten minutes.

After ten minutes, return to the dough, kneading until smooth and elastic, about eight to ten minutes. Place in a greased bowl and cover with plastic wrap and a kitchen towel, in a warm place, and let stand until doubled in bulk, 60 to 90 minutes.

Punch down dough, and divide into two equal pieces. Divide each piece in two again, and then each of those pieces into three, for twelve pieces of dough, roughly equal in size.

Grease two baking sheets, and sprinkle with cornmeal, if desired.

Roll each piece into a ball, pinching the bottom to secure the shape.

Place dough balls on baking sheets, pressing each ball flat with your palm, so that each ball forms a disc about a 1/2- to 3/4-inch thick. Let rise again, covered in plastic wrap and dish towels, until doubled, about 45 minutes.

Bake buns at 425°F, for about 20 minutes, until golden, then place on a wire rack until cool.

Slice in half and top with your favorite burger patty and condiments. Serve with “easy frites.” Or use as bread for your favourite sandwiches.