Hete Bliksem.

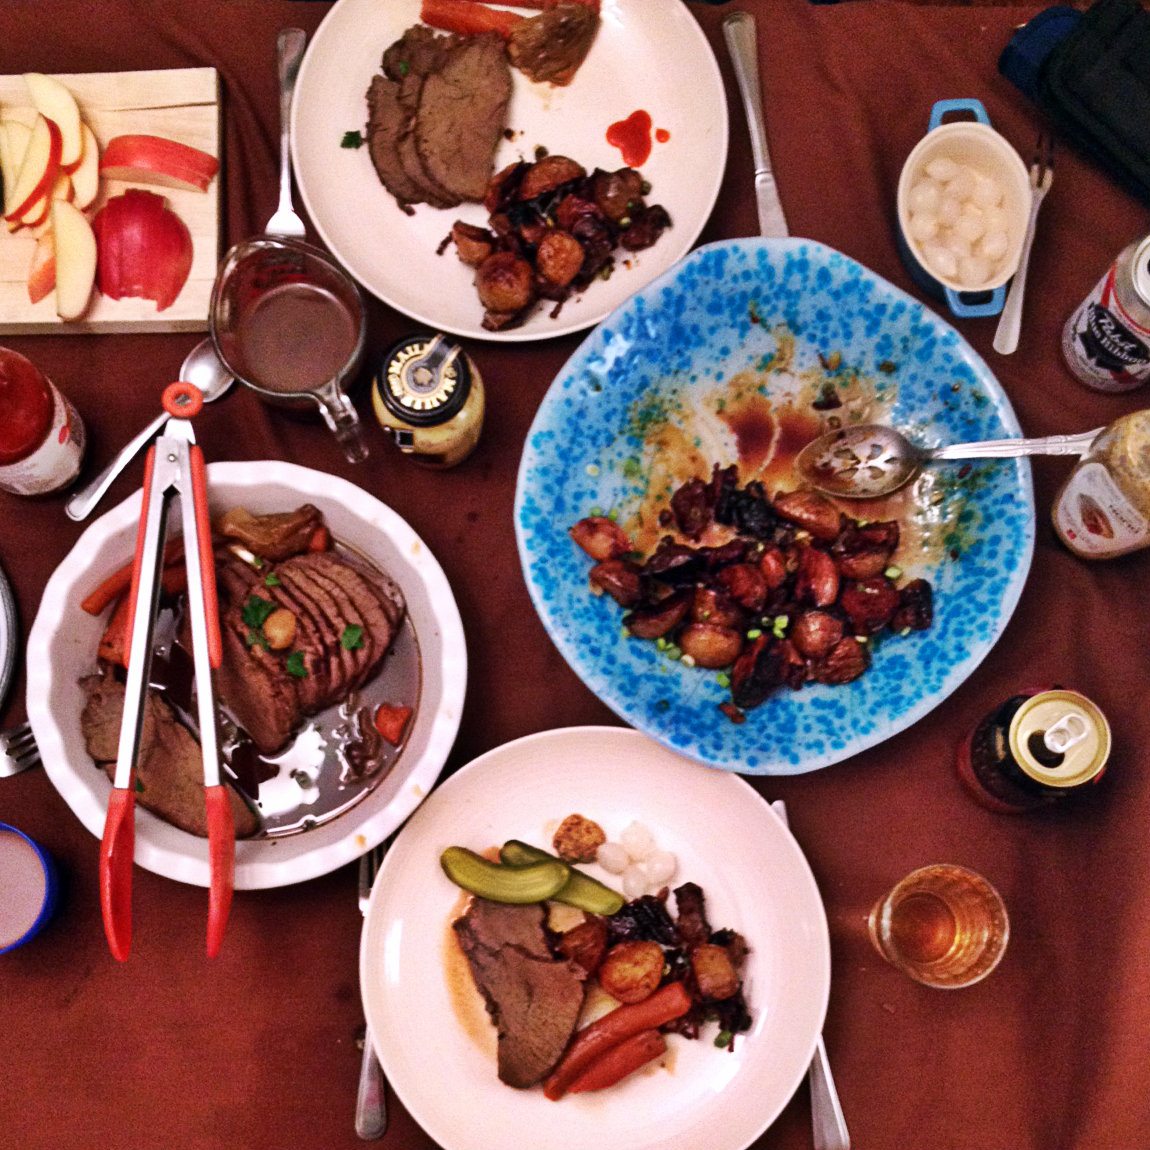
Dutch food is often comfort food, and as such, much of it is boiled to mush and then mashed and occasionally sugared in some way. Mush and sausages features heavily in the Dutch cookbooks I’ve acquired over the past year, and while that approach to cooking is not without its merits, there’s only so much mushy stuff I can pass off as dinner around here.

And so, Hete Bliksem. Typically, this dish is a mash of potatoes and apples with bacon or ham, and sometimes pears or onions, and it’s sometimes served with stroop, a kind of Dutch syrup. There are an infinite number of variations on this, from the very high end to the very simple. My variation falls somewhere in the middle, with an updated approach to the cooking so that the dish will stand alone as well as it would alongside a plate of sausages or roast meats.

It makes thrifty use of bacon fat and stuff you’ve probably already got in your fridge and pantry; I’d like to think the Dutch, or at least the less stubborn among them, would be pleased.

Hete Bliksem

(Makes four servings.)

  • 1/4 lb. bacon, finely chopped
  • 1 lb. crisp, sweet apples, such as Braeburn, Honeycrisp, or Ambrosia, cored and quartered, each quarter then halved again lengthwise, and then halved again cross-wise
  • 1 lb. new or nugget potatoes, scrubbed and cut into quarters
  • 1/2 tsp. coarse salt
  • 1/2 cup apple cider or unsweetened apple juice
  • 2 tbsp. fancy molasses
  • 1/4 tsp. allspice
  • 1/4 tsp. ground black pepper
  • 1 tsp. apple cider vinegar
  • 1/2 tsp. grainy mustard
  • 1 tsp. chopped fresh thyme
  • 2 scallions, finely chopped

Preheat your oven to 375°F.

In a 12-inch cast iron or other oven-transferable pan over medium high heat, cook bacon until it is very crispy and all the fat has rendered, about six minutes. Scoop the bacon from the pan and onto a plate lined with paper towel, and set aside.

You will need about three tablespoons of fat in the pan; if you don’t have another, add up to another tablespoon of fat, either bacon fat or olive oil. Add potatoes and apples to the pan, sprinkle with salt, and toss to coat.

Roast apple and potato mixture for 60 minutes, flipping midway through the cooking process.

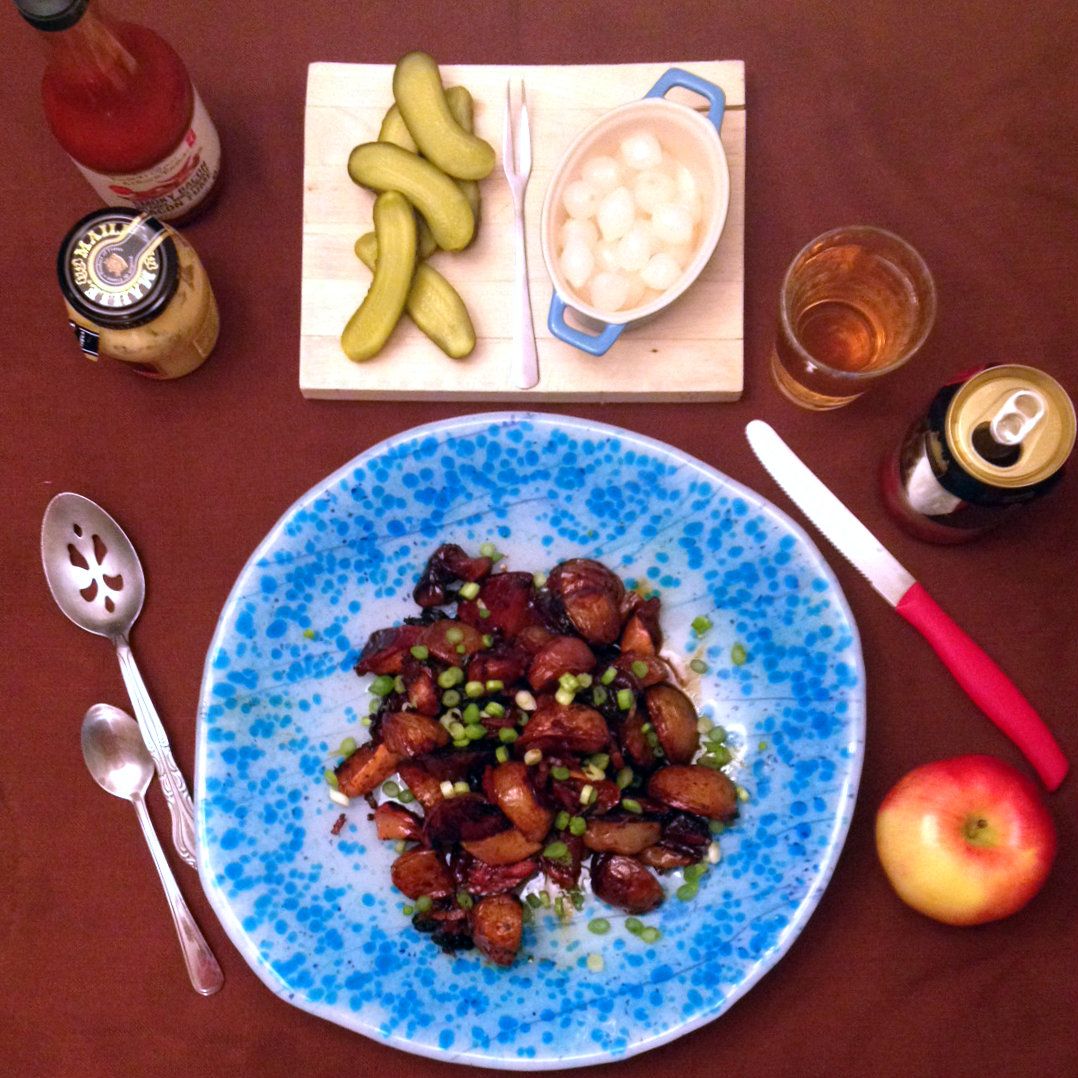
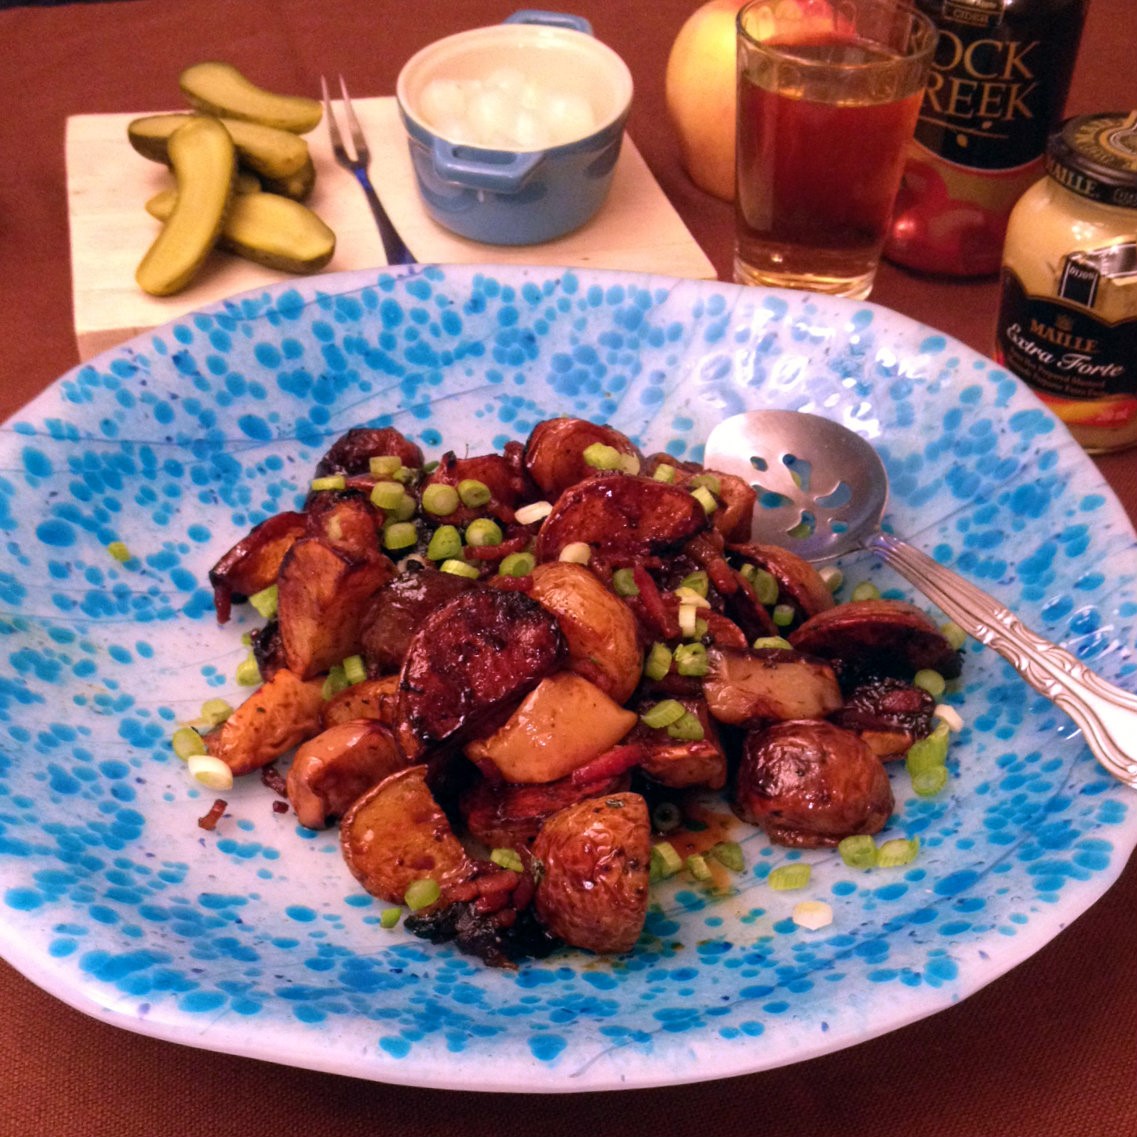
About 10 minutes before these are done, add apple juice, molasses, allspice and pepper to a small saucepan. Bring to a simmer and cook, stirring frequently, until reduced by about half  – it should be about the consistency of maple syrup.

Add cider vinegar and mustard, and set aside.

Remove the potato and apple mixture from the oven. Sprinkle with thyme and reserved bacon, then pour apple juice reduction over top, stirring to coat. Serve in the pan, or spooned onto a serving plate, and garnish with chopped scallions.

Candied pork belly.

I’m going to tell you a secret.

When your friends have children and they can’t stop telling you how easy it is, and what a super duper joy babies are every day especially at 3:00 a.m., and how diapers aren’t really that big a deal, you should take their claims with a medium-sized grain of salt. Especially if those friends only know, like, a handful of people who have babies and most of them live outside the city which is too far to take public transportation for play-dates.

They want you to have your own kids and join them. I am shameless about it.

Babysitters are expensive, so it’s nice when you can convince a few people close by to procreate and trade free babysitting, or even just spend Saturday nights together, drinking red wine and sighing heavily over the cost of daycare. And it took a little while, but I got one! My friends Aimee and Evani are expecting their first miniature human burden! This is very exciting news, as they just moved ten minutes away and right across the street from the place that sells dosas for $5.99 on Mondays. We are going to do so much commiserating! I am going to eat all the curry pancakes!

In the meantime, it’s important for a pregnant lady to have brunch made for her once in awhile. So this past weekend, Aimee, Evani, and Vanessa – three lovely, funny ladies – and I plonked down at my dining room table and we ate until we could barely muster the energy to stand up and waddle to the couches afterward.

For Aimee, I candied some pork belly. And now we are never having mere bacon at brunch ever again.

I stole the brining and braising of the pork belly from the Momofuku cookbook. You can find the recipe for the pork belly buns online, but I highly recommend this cookbook. Everything I’ve made from it has been worth making again and again.

Candied pork belly

  • 2 1/2 pounds pork belly, skin removed (about one kilogram)
  • 4 cups water
  • 1 cup brown sugar, divided
  • 1/2 cup plus 1/2 teaspoon Kosher salt, divided
  • 1 cup apple cider or unsweetened apple juice
  • 1/2 tsp. smoked paprika
  • 1/2 tsp. ground cinnamon
  • 1/4 tsp. cayenne pepper

Whisk together four cups of water, 1/2 cup of brown sugar, and 1/2 cup of Kosher salt until mostly dissolved. Place in a large, sturdy zip-top bag or container with a lid, and pour the brine over top. Seal and let brine in the fridge for 24 hours.

Remove pork belly from brine, and place fat side up in a 9″x13″ baking dish. Preheat oven to 300°F. Pour apple cider or juice over pork belly, cover the whole thing with aluminum foil, and cook for 2 1/2 hours.

Remove from oven, cool completely, and stick back in the fridge for at least three hours but preferably overnight.

Remove chilled pork belly from fridge. Cut in half width-wise (with the grain of the meat) and then into length-wise slices  (across the grain of the meat) about 1/4-inch thick.

Line a rimmed baking sheet with parchment or foil, and lay slices of pork belly evenly across the pan. Mix remaining brown sugar and salt with smoked paprika, cinnamon, and cayenne pepper. Sprinkle half of the mixture over the pork belly slices.

Turn on your oven’s broiler, and stick the pan right underneath. This part is going to require constant vigilance – it will take just a second to burn, so you need to pay attention. Watch the surface of the pork belly; what you want is for the sugar to melt and bubble. When it’s done that, take out the pan, flip your slices, and sprinkle the remaining sugar mixture over top; stick the pan back under the broiler and watch for the same sizzling.

Serve hot, with brunch foods.

Picnics and bacon-wrapped garlic scapes.

All of a sudden, two layers of clothes are too many layers of clothes, and my toes are naked and touching the grass, and I’m drinking wine in parks and getting dirty looks from the other mothers for all my drinking wine in parks. Summer finally landed in Vancouver yesterday, so picnic season began in earnest this afternoon.

I have written about the joy of picnics here before but I am getting older and with age has come a tendency to repeat myself, and also to assume that what I say bears repeating. Take yourself on a picnic. Bring a friend, and a bottle of wine, and something to nibble on, and whittle away the afternoon, or just languorously pass your lunch hour (bottle of wine optional in that instance, unless you work from home). All you need is a patch of grass and a bit of bread and cheese.

And garlic scapes, if you can find them. Even better if you can grow them. Wrap them in bacon, and eat them outside.

Bacon-wrapped garlic scapes

  • 24 garlic scapes
  • 8 strips bacon
  • Coarse salt
  • Pepper

Preheat your oven to 425°F. Lightly grease a rimmed baking sheet.

Trim scapes at the bud, leaving eight to 10 inches of the stalk. (I left the buds on some of the shorter scapes, and the flowers inside were a little fluffy, but not unbearable if you’re used to finding cat hair in everything.) Bundle scapes in threes, wrapping each as tightly as possible with the bacon.

Sprinkle each bundle with a few flecks of coarse salt, then with freshly ground pepper.

Bake for 25 minutes, until the bacon is brown and looks crisp. Flip the bundles halfway through. Delicious served hot, but also pretty nice eaten cold, in the shade, on the grass.


Canadian Pudding.

Our 2011 was a busy year, and many of its outcomes were unexpected. Nick was diagnosed with late-onset Type 1 diabetes. I found myself pregnant and then had a baby. We needed a bigger apartment, and a  two-bedroom opened up across the hall. Nick and I agreed on paint colours and the apartment got painted and nobody cried. I didn’t gain weight over Christmas. There were surprises at every turn, and we handled them surprisingly well – I’m impressed with us.

How was your year? I hear grumblings every now and then, and read them in blogs and on Facebook, about how 2011 was a hard year for a lot of people. It was a year of change and no money and tumult and bad weather, and the overwhelming sentiment last night and this morning seemed to be “Good grief, it’s finally over.” (We didn’t all go to Paris. We all deserved to, though.)

Maybe 2012 will be easier. My hope is that it’s a year of creativity and learning to do more with less – I hope this for me, and for all of us, because it doesn’t seem like life is going to get cheaper or easier for anyone anytime soon. I want to write more. I want to spend fewer dollars. I have to do both, but it’s becoming woefully apparent that I am unable to do either without serious focus and discipline. I want to find opportunities to write for money, which would solve both of my problems.

I want to fit into a smaller dress size without eating less cheese. I want to expand my repertoire of home-cured meats. I want the baby’s first word to be guanciale. These are lesser goals, perhaps, but smaller challenges make the bigger ones seem less daunting. Lara at Food. Soil. Thread. has a great take on resolution-making, and is in the process of achieving 101 of her own personal goals – I encourage you to check out what she’s doing and find your own inspiration.

And in the meantime, a goal that’s totally doable: eat more bacon. Let me help you with that.

Canadian Pudding

If this seems weird, I promise you that it is but in the most worthwhile way. It’s sweet and salty and maple and bacon and bourbon all play so nicely together, and when I served it to my friend Tracy she said that the bacon was a pleasant surprise, because she didn’t know what the taste was at first, and she liked it. You can scrap the bacon if your guests aren’t daring, I suppose.

(Serves four to six.)

Cake:

  • 2 strips thick-sliced smoked bacon
  • 1 cup all-purpose flour
  • 1/2 tsp. salt
  • 2 tsp. baking powder
  • 1/2 cup brown sugar, packed
  • 1/2 cup chopped toasted pecans
  • 1/2 cup milk
  • 2 tsp. melted butter
  • 1/4 tsp. ground nutmeg

Sauce:

  • 2 tbsp. melted butter
  • 2 tbsp. bourbon
  • 1 cup maple syrup
  • 1 cup hot water

Preheat your oven to 350°F.

In a pan over medium heat, cook bacon until crisp. Drain on paper towel, and then chop into bits.

In a 1 1/2 quart casserole or baking dish, whisk together flour, salt, baking powder, sugar, pecans, bacon bits, and nutmeg. Stir in milk and butter until dry ingredients are just moistened.

In a separate bowl, mix butter, bourbon, maple syrup, and water. Pour over cake mixture. Do not stir.

Bake for one hour. Let rest 15 minutes before serving.

Serve warm, with vanilla ice cream.

Happy New Year. I hope 2012 is good to you.

Rabbit cacciatore.

Yesterday Nick and I celebrated our third wedding anniversary. Kind of. I made a nice dinner, and then we zoned out in front of a bunch of cooking shows on the PVR. This year has kind of been a wash, celebration-wise; we haven’t celebrated any of our milestones properly. Nick turned 30 on Friday and we didn’t have plans, and I was all-day morning-sick on my birthday in April. We’re thinking of putting off Christmas until January. It’s been a busy year.

Fortunately I am a bit of a hoarder, and I figured we’d be all out of energy right around now. I have stocked the freezer, fridge, and pantry with everything we’ll need to eat reasonably satisfying and healthy meals until my employment insurance kicks in, so I was able to put together a luscious rabbit cacciatore while the baby dozed and the cat napped.

Rabbit is a very lean meat and a great alternative to the usual chicken or pork. It’s also a sustainable alternative, as rabbits are small, plentiful, reproduce quickly, and do not have the same impact on the environment as larger or more industrially farmed meats. If you can’t find rabbit at your local market, ask your butcher.

I adapted this recipe from Simply Recipes, adding pancetta, more veggies, a spot of wine, and some different herbs and spices, and it was just fancy enough for an anniversary dinner, but easy enough to put together between feedings and phone calls and commercial breaks.

If you don’t have bunnies in your freezer, you could substitute six to eight chicken thighs for the rabbit pieces. Serve over pasta, polenta, or rice.

Rabbit Cacciatore

(Serves six to eight; adapted from Simply Recipes)

  • 2 heads garlic plus 3 cloves
  • 4 tbsp. olive oil
  • 1 2- to 3-pound rabbit, cut into six or eight pieces
  • 1/4 cup all-purpose flour
  • 1/4 lb. pancetta, diced
  • 1 medium onion, diced
  • 2 ribs celery, diced
  • 1 large carrot, diced
  • 1 tbsp. capers, chopped
  • 1 tsp. red chili flakes
  • 1 tsp. dried rosemary
  • 1 tsp. dried oregano
  • 1/2 tsp. dried thyme
  • 1 large red bell pepper, chopped
  • 1/4 lb. mushrooms, sliced
  • 1/2 cup red wine, such as Cabernet-Sauvignon
  • 3 cups chopped tomatoes (or 1 28-oz can diced tomatoes including juice)
  • 2 bay leaves
  • Salt and pepper, to taste
  • Chopped parsley

Roast two cloves of garlic in an oven preheated to 350°F for 30 to 45 minutes until golden and tender.

Heat olive oil over medium-high heat. Pour rabbit pieces, flour, and about a teaspoon each salt and pepper into a sturdy plastic bag. Hold or seal the top of the bag, and shake to coat rabbit.

Brown rabbit pieces in olive oil, then remove to a plate. Set aside.

Brown pancetta in same pan. Add onion, three chopped cloves of garlic, celery, and carrot, and cook for three minutes.

Add capers, chili flakes, rosemary, oregano, and thyme. Stir to coat pancetta and veggies, then add bell pepper and mushrooms. Cook an additional two minutes. Add wine and scrape browned bits off the bottom of the pan, then reduce heat to medium. Add tomatoes and roasted garlic and bay leaves. Taste, adjusting seasonings as needed.

Add rabbit, pushing the pieces into the pot so that they are submerged. Cover, reduce to medium-low, and cook for 35 minutes, until rabbit is cooked and tender. Remove lid and simmer an additional 10 minutes to reduce sauce. Sprinkle with parsley before serving.

Rich, hearty meat sauce.

With the exception of a four-hour period last Friday during which I managed to score an excruciating, now-peeling sunburn from sitting on a patio during lunch, this part of the world has been slow to summer. Which is just as well, because I’ve recovered most of my appetite, and after Paris the taste I’m looking for is unctuous. Unctuous like long-roasted meat, and like the sauce around it, so rich with that slowly melted fat that coats your mouth and the inside of your belly, leaving you full and sleepy.

I went with Grace (and Claude, but that is a story for another time) to a restaurant in Paris called Bistroy Les Papilles where we were brought just such a dish. Three steaks of pork belly were served in a tomato sauce filled with navy beans, thyme, and fresh spring vegetables; the pork had been cooking long enough that most of the fat found itself in the sauce, so that the meal was deceptively rich. I succeeded in eating only a small plateful, though it was a satisfying plateful.

It’s not really possible during the week to cook a slab of pork belly until it melts down into and plumps several pounds of white beans, not when one has to go to a place of business and complete tasks each day – I do have a slow-cooker but it’s the kind that sets things on fire. It is possible to mimic that unctuousness on a weeknight at home; the secret is to use good-quality meat, a combination of pork fat and olive oil, and a cheaterly handful of minced mushrooms. Top with cheese.

This sauce is easy, but it’s not slimming. The point is comfort (as my point so often is), and this is one of those dishes you could serve to company some rainy night, even on the weekend. It’s layered, and tastes as though it cooked for much longer than it did. The cinnamon adds balance to the meatiness, so if you are unsure about it, just add a little bit and see what you think.

Meat sauce for pasta

(Serves eight.)

  • 6 strips bacon, chopped
  • 3 tbsp. olive oil
  • 1 medium onion, finely chopped
  • 1 cup celery, finely chopped
  • 1 cup carrots, finely chopped
  • 1 1/2 lbs. good quality ground meat (I like a combination of beef and venison or pork, but you could use just beef if that’s what you have)
  • 1/2 lb. mushrooms, finely chopped
  • 4 cloves garlic, minced
  • 1/2 cup dry red wine
  • 1 28 oz. can crushed tomatoes
  • 1 1/2 tsp. dried oregano
  • 1 tsp. ground black pepper
  • 1/2 tsp. dried basil
  • 1/2 tsp. cinnamon
  • 1 cup beef stock
  • Salt to taste
  • 1/4 cup finely chopped fresh parsley

Brown bacon in a large pot over medium-high heat. Remove from pot to a plate lined with paper towel using a slotted spoon.

Add olive oil, followed by the onion, celery, and carrots. If the veggies are cooking too quickly, reduce heat to medium, and cook until soft and lightly golden, about ten minutes. Remove from pot to a plate using a slotted spoon. If you reduce the heat, put it back before the meat goes in.

Add meat, mushrooms, and garlic, breaking the meat up with a wooden spoon as it cooks. When meat has browned, add back vegetables and deglaze the pan with the wine. Add crushed tomatoes, oregano, pepper, basil, and cinnamon, and then beef stock. Stir to combine, and then taste. Depending on your bacon and stock, you may or may not need to add salt. Let simmer over medium-low heat for 30 to 40 minutes, stirring occasionally. Before serving, add parsley. Serve over pasta with additional parsley for garnish, and a sprinkling of cheese.

For us, this is enough for dinner and leftovers, and for a bit to put in the freezer for dinner another night. It is better the next day. And if you live nearby, you will need it tomorrow because it will still be raining. If you are a cat, the birds will tease you relentlessly as they hide in the branches of the tree just outside your window. Right now we all need our share of meat sauce.

Lentils with bacon.

Nick is a pretty, pretty boy, with bright blue eyes and dimples, and he’s tall and I met him in poetry class in 2006. He was literate and a looker, and that’s all I thought I needed. We started dating in 2007, and shortly thereafter I learned that he fished. And then I learned that he hunted. We were engaged almost immediately, and I’m still surprised I wasn’t the one who asked.

For the past couple of years, we’ve had our freezer stocked with wild local venison, and I can’t think of a bigger thing to brag about. Last year Nathan, my brother-in-law, brought the deer home and we got a portion – a few pounds of ground meat and some backstrap. This year, he and Nick got the deer together a little north of Princeton, BC, and so we have half a deer to call our own, portioned into roasts, chops, stew meat, and ground, and it is some of the most flavourful meat I’ve ever had. Once you try the meat of an animal that’s lived a happy life and that’s been fed its natural diet, there’s no going back to that cruelly treated but cheaper feedlot stuff. This is beautiful meat, dark and lean, wild-tasting but not gamey. If it’s possible, I am more into Nick now that he’s bringing home wild game than I was when our teacher was comparing him to John Thompson and Ezra Pound. The good meat more than makes up for Nick’s faults, which I would later discover include teeth-grinding, wrong-part-of-the-toothpaste-squeezing, and drinking the last of anything I might have wanted in the fridge, among other things.

I’ve deviated a fair bit from what I wanted to tell you, and I hope you’re not disappointed that the thing I sat down to write about here was lentils. I made a venison sirloin tip roast tonight, and it was flawless, cooked perfectly and seasoned with black pepper and rosemary, but to be honest I didn’t write the recipe down and now I’ve forgotten it. I was intent on telling you about the lentils, which Nick groaned about when I suggested them, but which he later helped himself to seconds of, and even though I planned for there to be four servings of the stuff, there ended up only being two.

If you’re going to make these as your side dish, maybe make a salad as well, so there’s enough to go around. These lentils are spicy, warming, a little tart, and taste of bacon, so don’t underestimate their appeal.

Lentils with bacon

(Serves four as a side-dish.)

  • 4 strips bacon, chopped
  • 2 tbsp. olive oil
  • 1/2 onion, finely chopped
  • 1/2 tsp. red chili pepper flakes
  • 3 cloves garlic, minced
  • Zest and juice of 1 lemon
  • 1 19 oz. can lentils
  • 1/2 tsp. kosher salt (or to taste)
  • 1/2 cup chopped fresh parsley

In a large pan over medium-high heat, cook bacon until crisp. Remove bacon to a plate lined with paper towel, and drain all but one tablespoon of fat from the pan.

Add olive oil to pan.

Add onions to pan, and fry until translucent. Add chili flakes, garlic, and lemon zest, and cook until fragrant, about a minute. Add lentils, and then squish lemon juice over top. Add salt, and cook until lentils are warmed through and beginning to brown, about two minutes. Taste, adjust seasonings, and then add bacon back to the pan. Add parsley, and cook until leaves have brightened, 30 seconds to a minute, and then serve.

These are excellent alongside roasted meat, but they’d also be pretty fabulous on their own with some buttered crusty bread, or with some roasted winter vegetables for a mostly wholesome weeknight meal. The recipe is easily doubled, but if you do double it, taste as you go before doubling the lemon; the zest and juice of two lemons might be a lot more than you’ll need.


Creamy, springy trout chowder.

I know. You’re probably looking at that photo thinking, “wow, she’s pretty lucky,” or “he’s probably the best she could do.” Some days, I’m not sure which is right. Or maybe you’re new here and this is your introduction, and you’re thinking that you’ve made a horrible mistake in clicking whatever link brought you here.

Fortunately, today’s recipe is pretty sound. And it was fished for by the above-implicated weekend fisherman, which means it was local and sustainable and all those keywords that people and I love to toss around. So today, I have for you a recipe for trout chowder, and it is all the things you want from a chowder. Fresh. Moderately healthy, if fattening. Local. Contains bacon. Good stuff.

Trout chowder

(Serves six.)

  • 1/4 lb. bacon, cut into 1/2-inch chunks
  • 1 lb. new potatoes, boiled and cooled, and then cut into bite-size chunks
  • 3 stalks celery, halved lengthwise and chopped
  • 1 large clove garlic, minced
  • 1 tsp. lemon zest
  • 2 tbsp. all-purpose flour
  • 4 cups milk
  • 1 1/2 tsp. salt
  • 1 tsp. black pepper
  • 1/4 tsp. cayenne pepper
  • 1/4 tsp. nutmeg
  • 1/2 lb. trout, chopped
  • 1 cup frozen peas
  • 1 tbsp. lemon juice
  • 1/2 cup heavy cream

In a large (three or four quart) pot over medium-high heat, crisp up bacon. When bacon is glistening and crispy, add potatoes, stirring to coat, and fry for about three minutes, or until lightly golden. Add celery, garlic, and lemon zest. Sprinkle flour over top of ingredients in pot, and stir once again to coat.

Pour milk into the pot, and reduce to medium heat. Bring mixture to a boil, and once thickened, add pepper, cayenne pepper, and nutmeg. Stir in trout and frozen peas, and cook for five to seven minutes, until trout is cooked through and mixture has returned to a boil.

Stir in lemon juice, followed by the cream. Taste, and adjust seasonings as needed.

Serve hot, with bread (or corn bread!), and cold, delicious beer. This is the kind of meal that will remind your spouse, special someone, roommate, or friend that you are so much better than the best they could do, and they will appreciate you profusely. If that person has had their tongue in a fish’s mouth recently, you do not have to appreciate him back.

Leek and bacon barlotto.

I’m. So. Tired.

We went to Las Vegas this past weekend, for the very first time, and it was wonderful. We ate nothing but meat and drank nothing but beer and Bloody Marys for three days, and though our bodies are suffering, our minds are at peace, the stress of our daily lives forgotten as we pissed away our American dollars and gorged ourselves at the meat buffets.

The hard part is getting back to our lives as usual. Early bedtimes and dinners with vegetables are the order of the week. Tonight was grain night, and half of a one-dollar bag of barley formed the basis for dinner.

The following recipe makes enough for four to six as a side dish, or two to three as a main. It will double very easily. We ate it as a main, topped with a poached egg, and there was a bit left over. It’s a hearty alternative to risotto, as barley is a whole grain rich in both soluble and insoluble fibre, which means that it’s a great way to recover from a vacation in which you ate nothing good for you.

Leek and bacon barlotto

  • 2 to 3 slices thick-cut bacon, chopped
  • 1 cup chopped leek (one medium leek, white and light-green part only, cut into sixths lengthwise and chopped)
  • 1 tbsp. olive oil
  • 1 cup pearl barley
  • 2 or 3 cloves garlic, minced
  • 1/4 cup dry white wine
  • 3 to 4 cups warmed chicken stock
  • 1/2 cup grated Parmesan cheese
  • 1 tbsp. butter
  • Salt and pepper, to taste

In a large, heavy-bottomed pan, sauté bacon until crisp. About one minute before the bacon is ready, add the leeks, and sauté until glistening. Remove from heat and drain onto a plate lined with paper towel.

Drain the bacon fat, but don’t wipe the pan. Add olive oil. Return the pan to the stove, set to medium-high heat, and pour in barley. Stir fry barley and garlic until golden and toasted, about two minutes. The barley will smell toasty and will turn white before it browns slightly. Stir in the wine, and reduce to medium heat.

Once wine is absorbed, pour in one cup of stock. Stir frequently until stock is absorbed. Repeat two to three more times, over thirty to forty-five minutes, until barley has puffed and softened; you will want the texture to resemble al denté rice, slightly chewy but pleasing to the bite.

Once almost all of the liquid is absorbed, add bacon and leeks back to the pan, and cook with the barley. You’ll want the liquid to have almost completely disappeared. Once this happens, remove from heat.

Stir in butter and Parmesan cheese. Season to taste.

Serve with crusty bread, with more fresh-grated Parmesan cheese, possibly topped with a poached egg.

This is salty, cheesy, nutty, and thoroughly delicious, with just the right amount of chew and softness to make it the perfect comfort food to follow a weekend of gluttony, or just a hard, long week.

A very long post about pumpkin pierogies.

Pumpkin patchery!A couple of weekends ago, my five-year-old nephew, who I call Comet, looked me squarely in the eye, as five-year-olds do, and asked when Nick and I were going to go with him to the pumpkin patch for an adventure. Hallowe’en is nearly upon us, and he is aware of the significance of pumpkin season. Pumpkin season means dressing up like Darth Vader and carving jack-o-lanterns and getting free candy and then Christmas starts coming up fast. Pumpkin season is very important to a small boy.

So Nick and I promised we’d go out and help him pick the perfect squash.

Nick, Dad, and Nephew.It was a chilly, damp day, the first day of the rainy season where any of us actually needed a scarf and gloves. And boots. Cold it was, so hipsters we were not.

There were also many, many pumpkins to consider.

... decisions ...

... decided. On the first one.

Of course, we go to the pumpkin patch as much for my Dad as for Comet. So there were several pumpkins at the end of the day, some of them too large for a small boy. But just right for an old guy.

A very good pumpkin.I only bought one pumpkin, a small one that weighed about three pounds. A tiny little guy. Perfect for cooking, as we can’t really have jack-o-lanterns at our place – it’s an apartment, and also we’re not really allowed to have fires in the hall anymore. My pumpkin came from under cover, because my gloves are more ornamental than functional and also I didn’t want to touch anything wet. I also bought a big, dense turban squash, which is going to be something wonderful once I figure out how many it’ll feed, and a few decorative gourds that aren’t hard or shellacked and that I am going to try and eat.

Pumpkins from a dry spot.

Decorative gourds. Clearly badass.

A lot of those pumpkins looked like they’d make a very good pie, but, to be honest, pumpkin season is pie-filled enough already, and I made two cakes last week. At a certain point, and you’ll know it when you’ve reached it, you can have too many baked goods. I know it’s hard to believe, but a lot of people never get there. I get there twice a week, which explains why my pants are so tight, and why my chin is quickly becoming chins. I’m pretending like that’s where all my extra sex-appeal is kept.

There are lots of things that you can do with pumpkin that doesn’t include pie or baked goods, things you can enjoy even if you hate pumpkins.

A really good thing you can do with pumpkin, or any squash really? PIEROGIES! Who doesn’t love them? No one, that’s who. Fact. And now, after making you look at my touching album of family-bonding pumpkin fun, you get an awesome recipe for deliciousness that you can top with buttery bacony caramelized onions. Which I think is the opposite of pumpkin pie (even though I love it done right), or, at the very least, resides at a much less hackneyed end of the spectrum.

Pumpkin Pierogies

(makes about four dozen)

Dough:

  • 3 cups all-purpose flour
  • 1 cup plain yogurt or sour cream (go with the low-fat kind – it’s runnier, and makes the dough easier to work with. Don’t worry, you’ll make up for it by adding butter.)
  • 1 egg, beaten
  • 1 tbsp. melted butter (you can use olive oil if you want. I’m not Polish, I don’t know the rules, or if there even are rules about olive oil in pierogies, so it’s not really breaking them even if there are rules.)
  • 1/2 tsp. salt

Filling:

  • 1 3lb. pumpkin, roasted, seeded, pureed, and drained (will amount to about 2 cups. You can also use canned pumpkin if you want – the colour will be a lot bolder. Substitute squash, or even yams or sweet potatoes, if you like.)
  • 1/2 cup chopped cooked bacon
  • 2 whole heads of garlic, roasted until soft and dark golden
  • 1/2 cup grated Parmesan cheese
  • 1/2 tsp. pepper
  • 1/4 tsp. nutmeg
  • Salt, to taste

First, make the dough.

Combine all your dough ingredients in a bowl, and stir until a dough is formed. It will be a stiff dough, and you will find that you need to knead it a fair bit at first – this is okay. Knead for about two minutes, then let rest in a bowl covered with a dish cloth, for about an hour. The goal here is for the flour to absorb and swell with the moisture of the wet ingredients, and also for the whole thing to get to room temperature, thus making it easier to roll out.

While the dough rests, make the filling.

I used a food processor, but you don’t have to. I prefer a uniform texture in my pierogies, and this is the easiest way. You can just mash everything together if you like – that’ll work perfectly well too.

Combine pumpkin, bacon, garlic, cheese, pepper, and nutmeg. Mix well, then taste. Adjust your seasonings if need be. This would be the time to add salt if you feel like it.

Divide the dough into two pieces, rolling the first out until it’s about 1/8-inch thick, same as a pie crust. The dough should be nearly two feet long, and just over a foot wide when it’s all ready to be stamped.

Using a cookie cutter or glass (about two inches in diameter), stamp out rounds of dough. Get as many rounds as you can out of the dough; from the first batch of dough (rolled once, stamped, and then re-kneaded and rolled and stamped again) I got 27 rounds. Only roll each piece of dough twice – any more and it gets too stiff and hard to work with*.

Dough!

Stretch each round out a little bit, and then let it sit like a taco in the crook of your hand. Fill each round with about a teaspoon and a half of filling. To close these, you might find a little dab of water along one edge useful. Pinch it together along the outside, but don’t squeeze the middle. Your first couple of attempts at this might be messy – that’s okay. Just freeze those ones. They’re good fried, and they don’t leak as much when you cook them that way.

Pierogie station.

Get someone to help you. It’s more fun when you have someone to talk to.

Nick pinches pierogies.

Most likely, you will end up with a bit too much filling. I did. But I always do. I scooped the remainder into a container and shoved it into the fridge – it’s going to be a lovely little helper for a bit of squash soup later this week. No waste! In fact, the little remnants of the dough? Roll them out, and cut them into 1/4-inch pieces, like skinny little gnocchi. Then freeze them as well – they are a lovely little addition to a bit of minestrone on a cold December day.

To serve fresh, and you will want to cook up at least a few for your efforts, caramelize some onions in butter with as much bacon as you like. Bring a pot of salted water to a boil, then drop your little dumplings in. They’ll be ready when they float to the top. It won’t take long.

Getting there ...

When they’re done, drop them into the onion pan, and coat with the buttery bacon, oh, let’s call it “sauce.” Serve with sour cream or good yogurt.

Enjoy. It tastes like pumpkin, to be sure, but not the pie kind. The sweetness of the roasted garlic and the salty cheesy bacon-ness do interesting things to the pumpkin – they give it a life of its own, and invite it to be itself, not hidden under a veil of cinnamon and cloves. I promise they’re worth a try. And you’ll end up with lots of them – freeze most of them. And then when you feel like pierogies again (soon), fry them in butter until the outsides are crisp and golden and serve with a lot of sour cream and chopped green onions. Marvelous. Wonderful. Lovely, and a great way to get that pumpkin goodness into your mouth.

Perfection, plated.

* TWSS