Mustard fried chicken.

Mustard, chicken

Raising a small person in an apartment is not without its challenges; among these are a lack of space to really run. Not that there is any lack of running. Most of our walls are scuffed and dinged as Toddler doesn’t corner well and doesn’t always think to brace himself for a fall (and is often holding something blunt, sticky or staining). We’ve decided there’s no point trying to clean this place up until he’s in school. Everything smells like peanut butter. All our upholstery is crisp with dried yogurt.

Nick and I both grew up in the suburbs where there were always yards to play in and you could play outside mostly unsupervised. My parents built me a pink and white play-house in their back yard where I’d host imaginary dinner parties and punch my sister in secret, and Nick’s parents had a trampoline. We grew up in much bigger spaces. But there are drawbacks to suburban living as well, and since we’re determined to stay in a city where the cost of housing is almost laughably out of reach for any normal person, Toddler will remain yardless for the foreseeable future. 

Running

So we spend the couple of hours we get between the end of the workday and Toddler’s bedtime outside, running and roaming the local parks. He seems to enjoy it, and as his language develops we get to spend that time actually hearing about his day. (I say “actually” because this is a fairly new development. We’re getting sentences now, like “Quinn and I play camping,” or “No but I need a treat.”)

Sunset

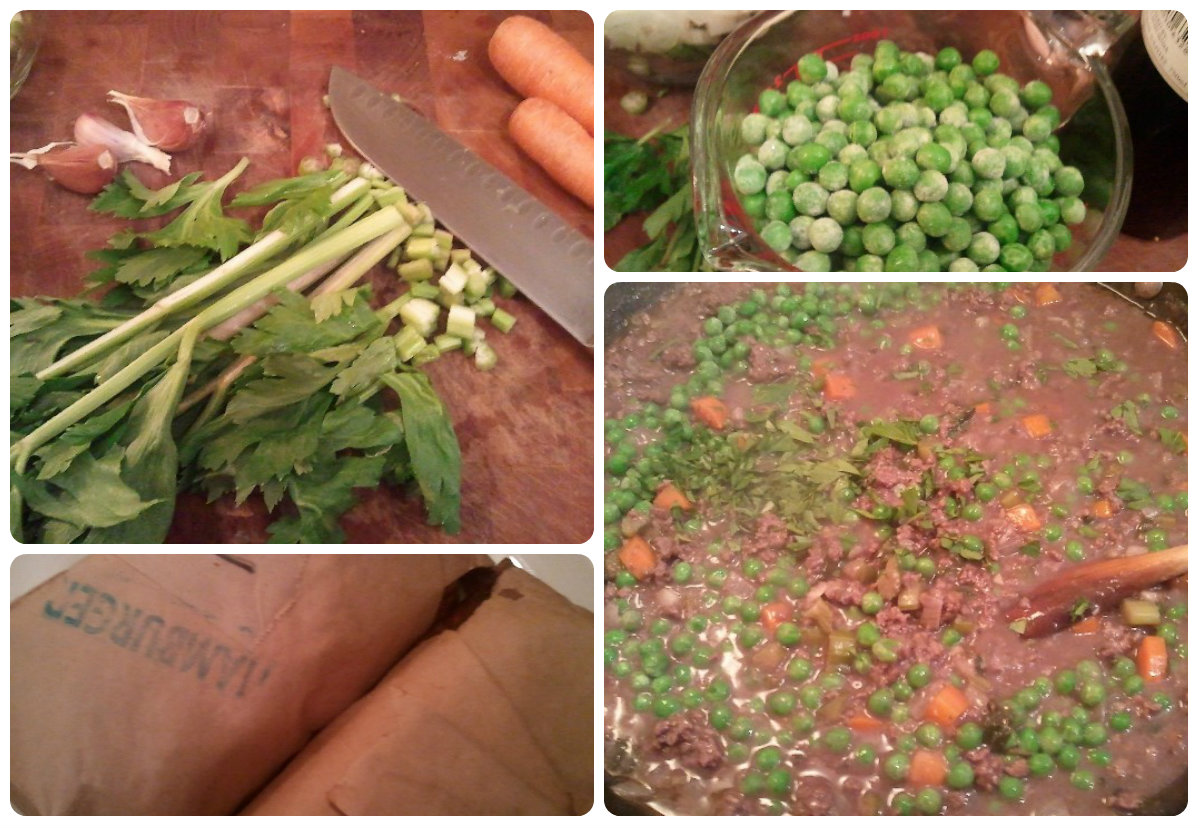
This has meant that dinner has been rescheduled; we frequently rely on the Crock Pot, or have simple dinners that we can prepare quickly after bedtime. Often, I do the dinner prep when I get home from work, and the cooking much later. Such was the case with the recipe that follows.

This one comes out of my unrelenting desire for fried chicken, drumsticks being on sale at the right time, and a combination of laziness and cheapness that I think has come to comprise my personal brand. I needed fried chicken urgently, as you do. But a buttermilk brine was out of the question – there was simply no time.

So, with a vague recollection of something I saw on the Food Network one time when there was nothing else on and we’d run out of movies we could both agree on, I put the chicken in a bag with some mustard and hoped for the best.
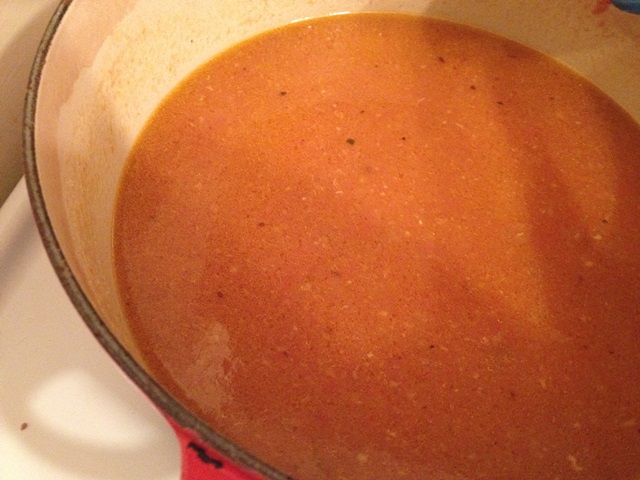
IMG_2426[1]

Let’s not bother with understatement: This mustard fried chicken was the best fried chicken I’ve had in 2014. And I have eaten more fried chicken in 2014 than is decent.

It would probably be even better with a longer marinate; I did it for an hour and a bit, and it was still very flavourful. The mustard (plus salt) works the way that buttermilk does, as it’s acidic and tenderizes the meat while flavouring it at the same time. But because it’s such a strong flavour, it does it in a lot less time. I think this one’s a keeper.

Fried chicken.

Mustard fried chicken

(Serves 2. Maybe 3. But probably 2.)

  • 6 chicken drumsticks
  • 2 tbsp. yellow (American) mustard
  • 2 tsp. salt, divided
  • 1 1/2 cups all-purpose flour
  • 1 tsp. ground black pepper
  • Honey (optional)
  • Peanut, vegetable or canola oil (for frying)

Put six chicken legs in a plastic bag. Splurtch the mustard and sprinkle about a teaspoon of salt over the chicken. Mush the chicken and mustard and salt together in the bag, and let them sit for maybe an hour.

Pour an inch of peanut, vegetable or canola oil into a cast-iron or otherwise heavy pan. Heat the oil to about 350°F.

In another bag, combine the flour, remaining salt, and pepper. Mix well. Remove the chicken from the first bag in to this second bag. With one hand holding the bag closed, shake the chicken as if it’s 1993 and you’re making Shake ‘n Bake.

Place the chicken in the hot oil and cook until crisp and golden on one side (about four minutes), then turn the legs over and cook another four or five minutes, until cooked through.

Drain the chicken on a wire rack (position it over a plate for easy clean-up) for five minutes. Drizzle lightly with honey, and serve hot.
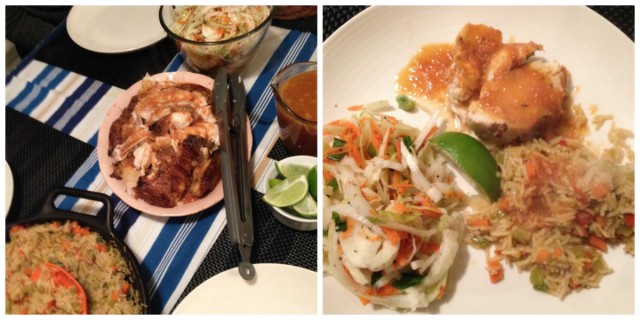
IMG_2431[1]

Oh! I forgot to mention. I joined Instagram – if you’re there too, let’s connect!

Peanut butter banana cookies.

Cookie monster.

He’s got my nose, but pretty much nothing else. This picky-eating business is flummoxing at best – the kid would live entirely on Nutri-Grain bars if given the option. I don’t get it. There is no “just try it,” no “just one bite.” He must get this stubbornness from his father.

Occasionally it’s nice to save ourselves a fight and just give in and give him what he wants. He wants cookies.

Fortunately he likes things like raisins and bananas, so I can make him cookies and not be tempted to eat every single one. To be honest, baking’s been a bit weird around here. It’s rare that we have a purely decadent baked good, as Toddler adjusts his standard of living very quickly and we’re trying to maintain some standards by keeping him off white flour … at least until he’s reached the age of reason and can be convinced to eat actual food. (The white flour is for me, because I have a lot of feelings to eat.)

2014-02-16 13.02.28

Peanut butter and banana cookies

(Makes about 2 1/2 dozen cookies.)

  • 2 1/2 cups whole wheat flour
  • 1/2 tsp. baking soda
  • 1/2 tsp. salt
  • 1/2 cup butter
  • 1/2 cup peanut butter
  • 1/2 cup granulated sugar
  • 1/2 cup brown sugar, packed
  • 1 egg
  • 1 tsp. vanilla extract
  • 1 cup mashed overripe bananas (about two medium)
  • 2 tbsp. ground flax seed
  • 1/2 cup chocolate chips
  • 1/2 cup raisins
  • Optional: 2 tbsp. hemp hearts or chia seeds

Preheat oven to 350°F.

In a medium bowl, mix flour, baking soda, and salt. Set aside.

In a large bowl, cream butter, peanut butter, and both sugars together until the mixture is fluffy and paler in colour than when you started. Using a spatula, scrape down the sides of the bowl. Add banana, flax, raisins, and chocolate chips, and hemp or chia seeds if using, and mix well.

Add flour mixture to wet ingredients and mix until thoroughly combined,

Roll into balls about an inch in diameter, and placed on a greased or parchment-lined baking sheet, leaving about an inch between each ball. Press with a fork, and bake for 10 to 12 minutes, until lightly golden. You don’t want to over-bake these, as they should be a bit soft and chewy. Serve warm, with milk.

Store in a container with a lid, or portion them off into smaller containers or baggies and freeze.

cookies

Salvadoran chicken with gravy.

emily

As you may recall, a while back I mentioned I was headed to El Salvador. I think I promised to tell you more about it. One day I am going to achieve work-life balance and then I will actually do the things I say I’m going to do! It’s going to be great.

Anyway, I did go to El Salvador in September. I was invited to tag along with a bunch of people from World Vision Canada on behalf of another site I write for, UrbanMoms.ca, and my job was to learn about poverty and child labour and write about what I saw and how Canadians could help. It was pretty much the ideal situation for a writer; they fed me and gave me endless fact-checking support and information and no specific instructions, just to write. I followed, and I listened. And, of course, I ate.

If you want to learn about someone, find out what they like to eat. If you want to learn about a place, eat its food and visit its public markets and grocery stores and food stalls.

On our third day there, after spending time with kids in a couple of rural villages, we went to San Julian for an early dinner. We didn’t get to much in the way of tourism, but we did find our way into a market there. There were the usual things – piles of fruit and vegetables, fish on ice, and stalls selling clothing, flip flops and soccer balls. It smelled sweet and faintly musky, like ripe mangoes.

There was a stall at the entrance that sold groceries and the woman there sold fresh Salvadoran chocolate in twist-tied sandwich baggies; she also sold spices. I noticed a row of small bags containing a mix of bay leaves, peanuts and sesame seeds, among other things, and tried to communicate my curiosity – I know approximately four words in Spanish.

Elizabeth, who is from El Salvador but lives in Ontario and works at World Vision Canada and who was along with us on our travels, explained (in her beautiful accent) that it’s a kind of seasoning people in El Salvador use for turkey. Because they were only twenty-five cents a package, and because I had never seen such a thing before, I bought several.

In the bus on the way home, she explained that you toast the spices really well in a pan, then mix them with tomatoes and chicken stock and sometimes wine and use it for the sauce you use to baste the bird as it roasts. I demanded a recipe, but she said you don’t need one – “you just mix the relajo and some tomatoes and wine or beer and cook it with turkey or chicken.” If you have leftovers, you eat the turkey and gravy on sandwiches the next day.

Interesting fact: I always pay my bills in the wrong amount because I can never remember the order of digits in a number, but a set of vague instructions for a meal that ends up as sandwiches is the kind of thing I will learn instantly and store in my brain for life.

There was never a chance to eat this poultry or these sandwiches while I was actually in El Salvador. I did eat twice my body weight in pupusas, and as much fresh grilled, raw, cocktailed and ceviched seafood as I possibly could, and at one point there was fried chicken and fried yucca and orange pop and pastries filled with dulce de leche for dessert and I could have died right there because what else do you need?

On our last day before heading to the airport, I managed to get over to the grocery store in the mall across from our hotel. I found more of the spice mix, so I bought another six packages (I am not insane) and was able to translate the ingredients. So when I came home I resolved to make Salvadoran turkey and gravy and sandwiches, and then assemble my own packages of relajo from ingredients I would find at home.

Trouble is, we are a family of three and the smallest of us doesn’t eat “food” so there has been no turkey. But you know what’s smaller than turkey but as (if not more) delicious? Chicken!

I am not sure this recipe is authentic. Everywhere I looked online said you have to purée the tomatoes with the relajo and then strain it and use it as gravy, but my blender is now 12 years old and barely works and I should just throw it out but then I’d have no blender. And I am too lazy for a lot of complicated extra steps.

So here you go.

To make the relajo: mix together a handful of bay leaves, sesame seeds, peanuts, pumpkin seeds in their shells, ground oregano, and one dried guajillo chili (stem and seeds removed). It also requires annatto seeds; if you can only find ground annatto, rub it directly onto the chicken; if you can only find whole seeds, mix them into the spice blend.

Relajo

Each packet I bought varies in the amount of each thing in the mix; I estimate that you’ll need eight to 12 bay leaves, crumbled, a teaspoon of sesame seeds, two or three whole peanuts, a few pumpkin seeds, and a teaspoon or so of oregano and annatto. If you can’t find annatto – and I’m sure this is blaspheme – just use turmeric; annatto is used for colour and doesn’t have a strong flavour. You can find annatto (also called achiote) in Latin American grocery stores or online. I bought it in Vancouver at the South China Seas Trading Co. on Granville Island.

Salvadoran roast chicken with gravy

(Serves four to six people)

  • 1 x 6 to 8 lb. roasting chicken
  • 3 tbsp. olive oil
  • 1 1/2 tsp. Kosher salt
  • 1 tsp. ground black pepper
  • 1 tsp. ground annatto seed (sub. ground turmeric if not available)
  • 3 lbs. tomatoes, halved
  • 1 onion, chopped
  • 1 head of garlic, halved crosswise
  • 1 batch of relajo (see instructions above)
  • 1 cup white wine
  • 1 cup chicken stock
  • 2 tsp. Worcestershire sauce
  • Additional salt and pepper to taste

Preheat your oven to 425°F.

Ideally, you will use one pan for this – a large pan to roast the spices, cook the chicken, and then simmer the gravy. If your roasting pan is stove-to-oven-friendly, then use it for the first step. If not, use a small pan to roast your spices and then put everything together in your roasting pan.

Rub your whole chicken with olive oil, then sprinkle salt, pepper and annatto or turmeric (if using) and rub again. Fold the wings behind the back of the chicken and truss the legs – tie the legs together so that they sit close to the body. Set aside.

Over medium low heat, toast your relajo until the mix is fragrant and your sesame seeds are golden. When this is done, remove the pan from the heat and set the spices aside. Place tomatoes, onions and garlic in the pan, sprinkle with the spices, then nestle the chicken in the middle. Add wine and chicken stock, and place in the oven.

Chicken, pre-oven

Roast for between 90 and 100 minutes, until the internal temperature reaches about 165°F, or when the juices run clear when pricked with a knife. Baste every 20 to 30 minutes, rotating the pan each time for even browning.

Remove the chicken from the pan when cooked, and tent with foil for 15 to 20 minutes.

Chicken.

Meanwhile, process the tomatoes, onion, garlic, spices and chicken juices through the finest disc on your food mill or press them through a fine mesh strainer back into the pan or into a saucepan. Add Worcestershire sauce and simmer for 10 to 15 minutes.

Tomato gravy

Taste, adjusting seasonings as needed. Serve with chicken, either on sandwiches or with rice.

salvadoran dinner

Another year, already?

In 2014, may you have everything you need.

For us, 2012 and 2013 were fast-paced and periodically relentless. I changed jobs, and will change jobs once more before the year is out; my contract ends at the end of May. (Side note: if you’re looking for a communications coordinator, my specialty is web communications and I am an asset to office potlucks.) Though money was tight and times were periodically tough, we always had enough. We were happy, even when we thought we weren’t. We had fun.

I hope you always have enough, and whenever possible more than you need, and that whatever you’re doing there’s fun in it.

I’m glad we’re still doing this. Happy New Year. Let’s meet again in 2014.

photo (2)

Stock.

Simmering stock

Happy Holidays! Did you celebrate? How was it? We have been busy, and apparently neglectful; the surest way to know we’ve not been home enough is the smell of cat pee on our bath towels and dirty laundry. And it’s not just the cat – our waistlines are suffering a noticeable neglect as well. We’ve eaten more food in the past week than I think we ate all year; definitely more calories. Definitely. I can feel my liver.

It’s not over yet. We have more dinners, more drinks, more friends and family and days filled with driving and negotiating with the car over how little we can get away with spending on gas. Our apartment is a hideous mess, but there’s almost no point in cleaning it. Why bother? We’re just going to have to do it again and again and again.

But the laundry’s going through its rotations, and I’ve found a quiet moment to process the leftovers. There is something meditative about picking meat off of bones; it requires focus, but it’s not strenuous work and the results mean future meals.

Even if we are just in the eye of this seasonal storm, I have found a moment of peace, and in it there is the warmth of bones and the produce that wilted in my crisper finding new life in a pot of stock that will nourish us back to health after December’s frantic gorging finally lets up.

You can’t even smell the cat pee anymore.

Make stock. It will warm your home and then when you’re too tired to do anything tonight or in a few days or next week, you’ll just bring some of it to a simmer with some veggies, a bit of meat and some noodles or grains or legumes and you’ll have an easy (and easily digestible) dinner that won’t take much more than 20 minutes to pull together.

There’s no real recipe. Most of the time I save my veggie scraps in a container in the freezer, and then when we eat a bird or a ham or a lot of bony beef, I put my scraps and bones in a stock pot with some herbs, some salt and pepper and a lemon. I fill the pot to about the 12-litre mark and simmer (never boil) for two hours or maybe more, depending on how the day goes. I usually end up with about eight litres of stock in the end, and that’s enough for eight pots of soup, or eight risottos, or 16 pots of Bolognese sauce or chili.

If you don’t have scraps in your freezer, use a couple of carrots, a few ribs of celery, an onion, the green tops of two leeks, and half a bunch of parsley and as many heads of garlic as you feel like (I always use two or three). For the bones, a carcass from Christmas dinner or a bag of chicken backs from your butcher will be perfectly fine; if you’re using raw backs to start, brown them in a bit of oil in the bottom of the pot with your veggies for extra flavour. But you don’t have to use meat; omit it and you’ll have yourself a perfectly lovely vegetable stock. Add some bay leaves, a handful of black peppercorns, and then just let it go. If anything scummy forms on the top, skim it off. There’s really nothing to it.

Strain it after a couple of hours, then put it back on the stove and simmer for longer to reduce it if you want, or don’t, but salt it at the end after you’ve tasted it. Cool it, then store it in large Mason jars or freezer bags in 4-cup portions.

Trust me on this – make stock. You’ll feel better knowing there’s nutritious, homemade soup in your future.

And enjoy the rest of the holiday season. There’s still fun to be had, and I hope you have it all.

Cottage pie.

The makings.

A shepherd’s pie is supposed to be filled with lamb, which makes sense, but we’re working on a freezer full of meat Nick hunted and for probably legal reasons, he didn’t hunt a single sheep. So, let’s call this cottage pie, because I think that’s what you call a dish of meat topped with potatoes when the meat isn’t lamb. Here it’s filled with moose or venison, depending on what’s at the top of the pile in the deep freeze.

We are eating a lot of comfort food these days, as the weather has called for it and our lungs and noses have suggested it might be time for cold season and there are Christmas trees in store windows now. I don’t know where most of my days go, but the seasons are short and the years are passing so much more quickly than they used to. So occasionally, on evening I don’t have any plans, I’ll invite a friend or two over, and we’ll share a semi-responsible bit of wine and listen to whatever playlist I’m currently obsessing over and eat big plates of something hearty. Comfort food for comfortable evenings. The stuff elastic waistbands were invented for.

Before and after.

Pro tip: If you measure out the wine before you start cooking, you will be sure to have enough for both you and the recipe.

Also, I cannot emphasize enough how much you need a food mill. Ask for one for Christmas! It is the best tool for perfectly fluffy, lump-free mashed potatoes; I used one for the potato and rutabaga topping and there was nary a lump to be found in my mash. They also stir and spread more nicely if they’ve been milled. I am not tall enough to food-mill on my counter, so I sit on the floor to do it.

Sitting on the floor, milling some turnips and potatoes.

Cottage Pie

(Serves 8)

Topping:

  • 4 lbs. starchy potatoes such as Russets, peeled and diced
  • 2 lb. rutabaga, peeled and diced
  • 1/2 cup butter
  • 2 eggs, beaten
  • Salt to taste

Filling:

  • 1/4 cup olive oil
  • 1 onion, diced
  • 2 stalks celery, diced
  • 2 carrots, diced
  • 3 cloves of garlic, minced
  • 2 lbs. lean ground beef
  • 1 tbsp. chopped fresh rosemary
  • 1 tbsp. Worcestershire sauce
  • 2 tsp. Dijon mustard
  • 1 tsp. ground black pepper
  • 1/2 cup all-purpose flour
  • 1 1/2 cups dry red wine
  • 2 1/2 cups beef stock
  • 2 cups frozen peas
  • 1/2 cup chopped fresh parsley
  • Salt to taste

Preheat your oven to 375°. Lightly grease a 9″x13″ baking dish.

Put cubed potatoes and rutabaga into a large pot of salted water and bring it to a boil over high heat. Once it’s boiling, drop the heat to medium-high and continue to cook.

Meanwhile, heat olive oil in a large pan over medium-high heat. Add onion, celery and carrots, and cook for two to three minutes, until the veggies have brightened in colour. Add garlic, cook another minute, then add your meat, breaking it into pieces with your hands as you drop it into the pan. Stir, cooking until meat has browned. Add rosemary, Worcestershire sauce, mustard, and pepper. Stir. Add flour, and stir again until all the white disappears into the mix. Add wine, scraping the bottom of the pan with your spoon, and cook another minute or two. Add stock, and simmer until the sauce has thickened and reduced just slightly. Taste, adjusting seasonings as needed. Add peas and parsley. Stir. Remove from heat.

Pour your meat mixture into your prepared 9″x13″ baking dish.

Once your potatoes and turnips are cooked – they should pierce easily with a knife once they are done – then drain. Put pack into the pot and mash, or process them in your food mill. Add butter, stir to combine, then add eggs. Stir quickly. Taste, adjusting seasonings to your taste.

Dollop the potato mixture over the meat. Spread to coat the pan evenly, ensuring your potato mix reaches the edges whenever possible. Drag a fork over the topping.

Bake for about 25 minutes, until golden and the meat bubbles around the sides. Serve with salad, red wine, and country bread.

Cottage pie.

Slow-cooker cabbage rolls.

I love cabbage rolls, but for years have not made them for the same reason I never make lasagna; I hate the requirement to boil a pot of water and cook each leaf before I can even get started. It sucks and I always burn myself and so I make stuffed peppers or stuffed squash instead. But then one day my mother-in-law told me that “the Ukrainian ladies told me you just put the whole cabbage in the freezer and then defrost it so you don’t have to boil it.”

I don’t know who the Ukrainian ladies are or even if I remembered the context of her statement correctly, but let me tell you – it works.

Cabbage rolls steps

Cabbage rolls just got easier to make. I much prefer forethought to effort, if I have to choose one over the other, and anything that I can do to save myself time and that also makes it so I can eat more cabbage rolls is something I am going to do over and over again. I keep re-reading that sentence and I am not convinced it even made sense but I stand by it.

I don’t pre-cook any part of these because I don’t have time to even do laundry so I am not going to take a lot of unnecessary extra steps for a weeknight dinner now that The Voice is back and every episode is two hours long.

There you go. There.

Also, it’s getting chilly again and the Crock Pot is the ultimate defense against the cold; there is something wonderful about coming in from the rain to a home that already smells like dinner. I put everything into the pot the night before and then throw it in the fridge; I just pull the food out in the morning, turn the Crock Pot on and let it go all day so it’s almost like dinner is a freebie. FREE CABBAGE ROLLS. It all just feels so right.

Morning matters.

Slow-cooker cabbage rolls

  • 1 head of green cabbage, such as savoy or Taiwanese
  • 1 large onion
  • 2 carrots
  • 2 stalks of celery
  • 4 cloves of garlic
  • 1/2 cup packed fresh parsley
  • 1 lb. lean ground beef
  • 1 lb. ground pork
  • 1 cup uncooked long-grain white rice
  • 2 eggs
  • 2 tbsp. olive oil
  • 1 tbsp. Worcestershire sauce
  • 1 tbsp. Dijon mustard
  • 2 1/2 tsp. Kosher salt
  • 2 tsp. smoked paprika
  • 1 tsp. dried savoury
  • 1 tsp. ground black pepper
  • 1 28 oz. can crushed tomatoes
  • 2 cups beef stock

Okay. So. The night before you want to roll your cabbage rolls for the following night’s dinner, put the cabbage in your freezer. When you wake up the next morning, take the cabbage out of the freezer and put it in a colander in the sink and let it defrost. Your mileage here may vary – my apartment tends to be on the warm side, so mine defrosted just fine; if you are unsure whether you can get your cabbage defrosted in time, start even earlier, and just let it defrost in the fridge over a day or two.

Meanwhile, finely chop your onion, carrots, celery, garlic and parsley. You can do this in the food processor if you’re feeling kind of lazy. I was. Put everything in a bowl, then scoop half out and put it into a different bowl. Set aside.

Add your beef, pork, rice, eggs, Worcestershire sauce, mustard, salt, paprika, savoury, and pepper to the first bowl. Mix thoroughly. You can do this a day ahead as well, just cover and refrigerate until you’re ready to use.

In the other bowl, add the crushed tomatoes and the beef stock. Taste, and season with additional salt and pepper to taste. Again, feel free to make this ahead of time and set it aside.

When you’re ready to roll, pour about a cup of the sauce mixture into the bottom of the Crock Pot. Cut the core out of your cabbage and discard it. Peel the leaves off, and cut out the thick part of the centre rib. Place a few tablespoons of your meat mixture into the top of the leaf, then roll it up, folding the sides in as you go. Place each roll into the pot as you go, ladling sauce over top as you complete each layer.

I ended up with about 20 cabbage rolls, which is too many to eat all at once but they freeze very well.

When you’re finished, pour the remaining sauce over top, cover with the lid, then either refrigerate until you’re ready to make these (if you’re doing it the night before), or cook them right away. Set your slow cooker to low, and cook for ten hours.

Serve with pickles.

Cabbage rolls with pickles

Spaghetti squash muffins.

spaghetti squash muffins

I make a lot of muffins.

Not on purpose, really; I have a picky eater and more produce than I know what to do with and I’ve got to get something that grows into him somehow and he’ll eat baked goods. All the baked goods. So, over the past year or so, I have honed my muffin-making prowess to the point where I believe I could now fill a book with deceptively healthy muffin recipes. When did I get so dull?

If it makes me seem any cooler, I am currently drinking a vodka and soda out of a topless sippy cup because we have a ran-out-of-clean-dishes situation.

Vodka. Topless. There you go, there’s some good stuff, right?

And we have reached that part of the year where all my good intentions in June have manifested in abundance come late-September, and now we’re into October and I have to do something with all the squash. “Good intentions” might be the wrong way to put it – I was a little more delusional than well-intended, I think, because while I love spaghetti squash, I don’t love having to eat a dozen of them all at once, but I never think about that when I’m enthusiastically thumbing seeds into the ground. So, between what grew in the garden and what I couldn’t resist at the farmer’s market, I am forced to get creative.

One does not simply feed a picky eater stringy bits of yellow squash. No.

Fortunately, I’m acing muffins these days and you can put spaghetti squash in muffins. You can. And it’s pretty good.

This recipe calls for 1 1/2 cups of cooked spaghetti squash; most of the time, that’s one whole spaghetti squash. If you’re a little short, just add a bit of applesauce to make up the difference.

Spaghetti squash muffins

  • 2 cups whole wheat pastry flour
  • 1 cup all-purpose flour
  • 1 cup rolled oats (not instant or quick-cooking)
  • 1 cup granulated sugar
  • 1 cup dark brown sugar
  • 1 tbsp. flax seed
  • 2 tsp. baking soda
  • 2 tsp. cinnamon
  • 1/2 tsp. Kosher salt
  • 1/2 tsp. ground ginger
  • 1/2 tsp. ground cloves
  • 1/4 tsp. ground nutmeg
  • 1 1/2 cups cooked and drained spaghetti squash
  • 1 cup grapeseed or other neutral-tasting oil
  • 4 large eggs, beaten
  • 1 tsp. vanilla or maple extract
  • 1 cup chopped walnuts

Cook your spaghetti squash. There are a bunch of ways you can do this – I usually just throw the whole thing into a 400-degree oven and let it go until it’s soft, but that’s not terribly helpful. You can also microwave it, which is faster. Check this list out, and cook it however you like; just be sure to discard the seeds and scrape the flesh into a colander in the sink to drain it; drain for about 15 minutes, after which the squash should be cool enough to work with.

Preheat your oven to 350°F. If you have two muffin pans, you are very lucky – grease them both, or line the little cups with whatever kind of liner you like. I’m cheap, so one muffin pan plus grease it is.

In a large bowl, combine your flours, oats, sugars, flax, baking soda, spices, and salt. Mix well.

In another bowl, mix squash, oil, eggs, and extract. Fold into your dry ingredients until they are just moistened; add your walnuts and fold again.

Spoon your batter into muffin tins until each muffin cup is about three-quarters full. You should get between 21 and 24 muffins.

Bake for 18 to 20 minutes, until a toothpick inserted in the centre comes out clean.

Whoever you’re deceiving with these will never notice that these are kind of good for them, I promise.

Picky.

Green hot sauce.

Serrano and jalapeno peppers

If you have ever thought of pepper-spraying your entire family, but didn’t have the nerve, well, I have an idea for you.

We are now in my very favourite time of the year, because it’s still hot enough to run around without sleeves but the produce is at its most awesome, and I can’t stop blowing my paycheque on ridiculous quantities of stone fruit, tomatoes, and peppers. Nick swore out loud on Sunday when I decided his penance for a weekend camping trip was to Tetris the hundred pounds of farm market bounty I’d managed to lug home into the fridge; there is simply no more room, and I can’t stop. It’s too good. It’s all too good.

“You have to do something about this,” he said, shoving the door closed. “No one needs this much damn zucchini.”

Well, I beg to differ. Let’s not even talk about everything that’s suddenly ripe in the garden. Nick certainly doesn’t want to talk about it.

So, because I am responsible and have an unlimited tolerance for a humid, sweltering apartment, I have been canning the many things I brought home, because the only thing that makes Nick happier than a fridge that won’t close are cupboards that can’t contain the groceries. I made hot sauce. It’s basically sriracha, but green.

We all paid a little bit for this, but it was worth it. Open a window if you do this; if you have a camp stove or a barbecue with a side burner, then cook this outside. Or, if everyone you live with is being a real jerk about the harvest season, then reduce a pound and a half of hot peppers with all their seeds right smack in the middle of your 900 square-foot apartment and listen to them whine and whine and whine.

They’ll forget all about it when they’re spooning green gold onto their sausages come February.

Note: Ideally you will make this using a food mill. If you don’t have a food mill, start by seeding the peppers (if you don’t want this hot-damn hot), then process in a blender or food processor before proceeding to the simmering/reduction stage. The finished product is not too too hot; it’s flavourful with a nice, slow burn.

Green hot sauce

Homemade green hot sauce

(Makes about five 250mL/1-cup jars.)

  • 1 1/2 lbs. serrano or jalapeño peppers, or a combination
  • 1 lb. onion, peeled and chopped
  • 2 heads garlic, cloves separated and peeled
  • 3 cups distilled white vinegar
  • 3 tbsp. granulated sugar
  • 4 tsp. Kosher salt

Remove the stems from your peppers and chop them roughly. Throw them into a heavy-bottomed, non-reactive pot (such as enameled cast iron or stainless steel) with all the other ingredients, and bring them to a simmer over medium-high heat.

Cover, and cook for 15 minutes until soft.

Meanwhile, sterilize 5 jars in a large stock pot; you’ll want to boil the jars in water that comes to about two inches over the tops of the jars. Boil for 20 minutes.

Remove the chilies from the heat, and spoon the peppers and liquid into a food mill positioned over a large glass bowl. Process through the food mill until there’s nothing more running through. Scrape the bottom of the food mill into the bowl.

Pour strained pepper mixture back into your pot, return to medium heat, and simmer for 20 to 30 minutes, until reduced by about half.

Spoon into sterilized jars and wipe the rims with a piece of damp paper towel. Tap the jars to dislodge any trapped air. Place sterilized lids on top, then screw on the rings; you want them just tight enough that they’re closed, but that you could still unscrew using your thumb and finger. Process the sealed jars in boiling water for an additional ten minutes. Remove using canning tongs and let cool for 24 hours. Check that jars are sealed, and then store sealed jars in a cool, dark place. Spoon the vinegary, garlicky pungent stuff over February’s wintry food and relive the magic of a fridge brimming with life.

finished sauce

On onions, and faking it.

I first learned of Impostor Syndrome through my friend Grace. I think it might be contagious.

Today Nick went to the butcher and bought some spicy bratwurst, which he thought would be delicious on buns. “You’ll fry up some onions, right?” he said, and I agreed I would.

WP_004008

Every time I try to caramelize some onions, there is a point in the middle where I am sure it isn’t going to work. It is the part where some of the onions are dark and shrunken, but most of them are still thick with little to no browning. Every time, I am certain that I cannot do this, that every time that I have ever successfully caramelized an onion in the past has been an accident, a fortuitous mistake.

I am not good at anything, despite any evidence to the contrary.

This is a recurring theme, most notably at work, and at home with Toddler.

At work, I am faking it. Despite having been gainfully employed for 50% of my life to date, I still feel like an amateur; what do I know about anything? I am barely even an adult, even though I’m 30. I am making it all up as I go, bluffing my way through meetings and reports and projects. Who am I to call myself an authority? I don’t know anything. Half-way through my current contract, I am certain this is never going to work.

And with Toddler, this feeling of incompetence is amplified.

WP_004012

The kid doesn’t eat. He is growing, and he is not skinny, but I am never sure that he has gotten enough nutrients, and surely by not fighting him hard enough we are stunting his growth and knocking points off his future IQ. He prefers baked goods – sweet carbs like muffins, doughnuts, banana bread; today he went to a birthday party and was handed a hot dog. He discarded the wiener and ate the whole bun and then some cake. For dinner I gave him maple breakfast sausage in small pieces, crackers, red peppers, apples and raisins. He ate the apples and raisins, a few bites of the crackers, and threw the rest on the floor.

I write about food, but my own child won’t eat.

WP_004010

This can’t be just my problem. We are all faking it, aren’t we? At what point do we begin to feel like fully fledged grown-ups who know their own ish? Intellectually, I know if I keep turning the onions over medium heat, eventually they will brown. And still, I am sure every time that it isn’t going to work. I have done it wrong, chopped the onions too thick, and it is so easy to do right – how could I have failed? And still, they turn out. They brown, they soften, they are delicious on buns with bratwurst and I am silly.

With patience, they turn out every time.

WP_004014

Am I alone on this? Or are we all impostors? When do we start to feel like we know what we are doing?